Tuesday, November 12, 2024

How to build a wooden gun cabinet with a classic design

- 0 comments
How to build a wooden gun cabinet with a classic design

Building a Classic Wooden Gun Cabinet

A classic wooden gun cabinet is a timeless addition to any home, providing secure storage for your firearms while adding a touch of elegance and craftsmanship to your décor. Building your own cabinet allows you to customize it to fit your needs and style preferences, giving you a piece that reflects your personality and enhances your home’s ambiance. This detailed guide will walk you through the process, from planning to finishing, so you can create a beautiful and functional gun cabinet that you’ll treasure for years to come.

Planning Your Gun Cabinet

Before diving into construction, take the time to plan your project carefully. This ensures a smooth process and a finished product that meets your specific requirements.

Determine the Size and Dimensions

Consider the number and size of firearms you need to store and the available space in your home. Measure the area where you plan to place the cabinet to determine the ideal dimensions. Remember to factor in the thickness of the wood and any additional features, such as shelves or drawers.

Choose Your Wood

Selecting the right wood is crucial for both aesthetics and durability. Classic gun cabinets are often crafted from hardwoods like oak, cherry, walnut, or maple. These woods are strong, beautiful, and age well. Consider the grain pattern and color of the wood to match your desired style.

Design the Cabinet Features

Decide on the features you want to incorporate. Consider:

  • Number of shelves and drawers
  • Placement of locks and hinges
  • Style of doors and hardware
  • Any additional elements like a glass display area or a built-in cleaning station

Sketch out your design or use a CAD program to visualize your vision.

Gathering Materials and Tools

Once you have a detailed plan, gather the necessary materials and tools to begin construction. This includes:

  • Wood: Cut to your specific dimensions, taking into account the thickness of the wood.
  • Hardware: Hinges, locks, drawer slides, shelf supports, and any decorative hardware you desire.
  • Woodworking tools: Table saw, circular saw, drill, screwdriver, hammer, clamps, sandpaper, and measuring tools.
  • Finishing supplies: Wood filler, stain, varnish, or paint to achieve your desired look.

Organize your workspace and ensure you have adequate lighting and ventilation for safe and efficient work.

Construction Process

With materials and tools ready, you can start building your cabinet. Follow these steps carefully:

Cut and Assemble the Cabinet Frame

Cut the wood for the sides, top, bottom, and back of the cabinet according to your measurements. Use your table saw or circular saw for precise cuts. Assemble the frame using wood glue and screws, ensuring all corners are square and secure.

Add Shelves and Drawer Slides

Install shelves according to your design, using shelf supports or cleats attached to the cabinet sides. If you are incorporating drawers, install drawer slides on the sides and back of the cabinet, ensuring they are level and aligned.

Attach Doors and Hardware

Attach the hinges to the doors and cabinet frame. Install the lock and any additional hardware you chose. Ensure the doors open and close smoothly and that the lock functions properly.

Sand and Finish

Once the construction is complete, sand the cabinet using progressively finer grit sandpaper to achieve a smooth surface. Fill any gaps or imperfections with wood filler and allow it to dry completely. Stain or paint the cabinet to achieve your desired color and finish, applying multiple coats for optimal protection.

Safety Considerations

Safety is paramount when working with tools and power equipment. Take the following precautions:

  • Always wear safety glasses and hearing protection when operating power tools.
  • Use clamps to secure wood during cutting and assembly.
  • Keep your work area clean and free of clutter.
  • Never use tools that are damaged or malfunctioning.
  • Follow the manufacturer’s instructions for operating all tools.

Adding Personal Touches

Once the cabinet is complete, add your personal touches to create a unique piece that reflects your style. This could include:

  • Adding decorative trim around the edges of the cabinet doors.
  • Incorporating custom engravings or nameplates.
  • Creating a personalized interior design using velvet lining or a decorative shelf paper.

These finishing touches enhance the beauty and character of your classic wooden gun cabinet.

Conclusion

Building a classic wooden gun cabinet is a rewarding project that allows you to create a beautiful and functional piece of furniture. By carefully planning, following the steps outlined above, and incorporating your personal touches, you can craft a cabinet that will provide secure storage for your firearms while adding a touch of elegance and craftsmanship to your home. Remember to prioritize safety throughout the project, enjoy the process, and take pride in your creation.

[Continue reading...]

How to build an office desk with drawers and cabinets

- 0 comments
How to build an office desk with drawers and cabinets

Building Your Dream Office Desk: A Step-by-Step Guide to DIY Success

Are you tired of your cramped, cluttered desk? Do you dream of a spacious, organized workstation where every tool and paper has its place? Well, dream no more! You can build your very own custom office desk, complete with drawers and cabinets, and it's not as daunting as it might seem. This guide will walk you through the process, from choosing the right materials to assembling your masterpiece.

Planning Your Desk: The Foundation of Success

The first step is to get your creative juices flowing and visualize your dream desk. What size and shape will it be? What features are essential, like drawers, cabinets, a keyboard tray, or a monitor stand? And most importantly, how much space do you have available? Here's a breakdown to get you started:

1. Dimensions and Shape

Measure your available space carefully. Consider the width, depth, and height you need for a comfortable workspace. Think about your existing furniture and how it will fit with your new desk. Do you want a traditional rectangular shape or something more unique, like an L-shaped desk?

2. Features

Think about what features would make your work life easier. Do you need lots of storage for files and supplies? Would you prefer a built-in keyboard tray or a monitor stand? Do you want to include a hidden compartment for electronics or personal items?

3. Materials

This is where the real fun begins! You have a wide range of materials to choose from, each with its own pros and cons:

  • Wood: Solid wood like oak, maple, or cherry offers durability, classic beauty, and a timeless appeal. However, it can be expensive. Consider pine or plywood for a more budget-friendly option.
  • Metal: Steel or aluminum can create a sleek, modern look. They're often more durable than wood but can be more expensive and require specific tools.
  • Laminate: Affordable, easy to work with, and available in a wide range of colors and patterns. Consider using it for the desktop surface and pairing it with wood for the legs and drawers.
  • Gathering Your Tools and Supplies

    Once you have a clear vision of your desk, you'll need to gather the tools and supplies. This list is a starting point, and you might need to adjust it based on your specific design and materials:

    1. Tools

  • Measuring tape
  • Level
  • Circular saw or table saw
  • Jigsaw
  • Drill
  • Screwdriver
  • Sandpaper (various grits)
  • Clamps
  • Safety glasses
  • Work gloves
  • 2. Supplies

  • Wood or other chosen materials
  • Wood glue
  • Screws (various sizes)
  • Drawer slides
  • Cabinet hinges
  • Paint or stain (optional)
  • Protective finish (polyurethane, varnish, wax)
  • Building the Desk Frame: The Foundation of Your Workstation

    The desk frame is the backbone of your project. It's the structure that supports the desktop, drawers, and cabinets. Here's a step-by-step guide:

    1. Cut the Frame Pieces

    Using your saw and measuring tape, cut the wood or other materials to the precise dimensions for the frame pieces. You'll need two side pieces, two front/back pieces, and any additional pieces for supporting the drawers or cabinets.

    2. Assembling the Frame

    Carefully align the pieces, making sure all corners are square and the frame is level. Use wood glue and screws to secure the pieces together. Make sure the screws are countersunk (flush with the surface) and pre-drilled holes for the screws to avoid splitting the wood.

    3. Reinforcements

    To ensure the frame is sturdy and can handle the weight of your desktop and other components, consider adding cross-braces for extra support. These can be simple pieces of wood attached to the inside of the frame. Use a similar approach to building the drawer and cabinet boxes.

    Creating the Drawers and Cabinets

    Drawers and cabinets are what really make your desk functional. Here's how to build them:

    1. Drawers

    Cut the drawer pieces to the desired dimensions. Assemble them using wood glue and screws. Be sure to use drawer slides to ensure smooth operation. Install the drawer slides first and then attach the drawers to the frame.

    2. Cabinets

    Follow the same steps as for the drawers, using wood glue and screws. Use cabinet hinges to attach the doors, making sure they align properly and open smoothly.

    Finishing Your Masterpiece: Adding the Finishing Touches

    The final steps bring your desk to life!

    1. Installing the Desktop

    Choose your desktop material and cut it to the desired size. Attach it to the frame using screws or a sturdy adhesive, making sure it is level and sits securely. You can use additional support brackets if needed.

    2. Sanding and Finishing

    Smooth any rough edges or imperfections with sandpaper. Apply a finish, such as paint, stain, polyurethane, or wax, according to your preference. Let it dry completely before placing anything on the desk.

    3. Accessorizing

    Add the finishing touches! Consider adding a built-in keyboard tray, a monitor stand, a cable management system, or other accessories that complement your desk's style and functionality.

    Troubleshooting and Tips

    Here are a few tips for success, along with solutions for common problems:

  • Measure twice, cut once: Accurate measurements are crucial for a well-made desk. Double-check all dimensions before making any cuts.
  • Use quality tools: Investing in good quality tools will pay off in the long run. Sharp blades, accurate measuring tools, and a good drill will make the job easier and produce better results.
  • Don't rush: Take your time and work carefully. Building a desk is a process, and it's better to do it right than to rush and end up with mistakes.
  • Pre-drill holes: Pre-drilling holes for screws will help prevent the wood from splitting, especially when working with hardwoods.
  • Use clamps: Clamps are essential for holding the pieces together while the glue dries. Use plenty of clamps to ensure a tight bond.
  • Sanding: Sanding is important to create a smooth finish. Start with coarse sandpaper and work your way up to finer grits.
  • If you make a mistake, don't panic: Mistakes happen, and you can always correct them. Don't be afraid to take a step back and try again.
  • Congratulations on Your Desk Success!

    You've done it! You've built your own custom desk. Enjoy the satisfaction of having created something unique and practical. Now you can relax, organize your workspace, and finally have the desk of your dreams. As you work on it, you'll have the pride of knowing you built it yourself. And if you decide you want to add a bookcase or a shelf, you'll have the confidence to tackle those projects as well. Happy building!

    [Continue reading...]

    Monday, November 11, 2024

    How to create a wooden desk with a foldable top for storage

    - 0 comments
    How to create a wooden desk with a foldable top for storage

    Building a Wooden Desk with a Foldable Top for Storage

    Tired of clutter and limited desk space? A foldable desk with built-in storage provides a practical solution for both small spaces and organized living. This project allows you to create a functional and stylish desk that doubles as a storage unit, keeping your workspace neat and maximizing your room's efficiency. Let's embark on this DIY journey together, step-by-step, to transform your vision into reality.

    Planning and Materials

    Before we begin, let's gather the necessary materials and plan the dimensions of your desk. Measure your available space and decide on the desired size of your desk top. The foldable top can be designed as a single panel that folds down or multiple panels that can be flipped down to reveal storage compartments. You can personalize the design with additional features like shelves, drawers, or a built-in keyboard tray.

    Essential Materials

    • Wood (plywood, MDF, or solid wood) for the desk top, frame, and storage shelves
    • Hinges for the foldable top
    • Wood screws and glue
    • Wood stain or paint (optional)
    • Finishing touches (optional: handles, knobs, etc.)
    • Measuring tape, pencil, saw, drill, sander, clamps, and safety gear

    Constructing the Base and Frame

    Start by building the sturdy base of your desk. This will provide a stable foundation for the foldable top and storage area. Cut and assemble the frame using wood of your choice. Ensure you cut the pieces with precision for a smooth and solid structure. You can add decorative details or moldings to the frame to enhance the aesthetics of your desk.

    Assembling the Base

    1. Cut the frame pieces to the desired size.
    2. Securely attach the frame pieces together using wood screws and glue.
    3. Check for levelness and adjust as needed.

    Building the Foldable Top

    The foldable top is the heart of this project. You can either use a single panel that folds down or multiple panels to create compartments for storage. Construct the top using strong wood and attach hinges strategically to allow for smooth and effortless folding. Remember to consider the weight of the top when selecting hinges. If necessary, use additional supports to reinforce the structure.

    Crafting the Foldable Panel

    1. Measure and cut the wood for the top panel(s).
    2. Attach hinges to the top panel and the frame of the desk. Ensure the hinges are securely installed.
    3. Test the folding mechanism and make any necessary adjustments.

    Creating the Storage Compartments

    With the base and foldable top in place, it's time to build the storage compartments. Cut and assemble the shelves or drawers to fit within the designated space. Remember to leave enough clearance between the shelves and the foldable top for comfortable access. You can add decorative accents to the shelves and drawers for a polished look.

    Designing the Storage

    1. Measure and cut the wood for the shelves or drawers.
    2. Attach the shelves or drawers to the base of the desk. Ensure they are secure and level.
    3. Add drawer slides and handles for drawers, if applicable.

    Finishing Touches

    Your foldable desk is taking shape! Now, add the final touches to personalize it. Sand the entire desk, including the frame, top, and shelves, to create a smooth surface. Apply a wood stain or paint to achieve your desired color and finish. Consider adding decorative hardware, such as handles, knobs, or trim, to enhance the look and functionality of your desk.

    Adding the Final Flourishes

    1. Sand the entire desk to create a smooth surface.
    2. Apply wood stain or paint for your desired color and finish.
    3. Add decorative hardware like handles, knobs, or trim for a personalized look.

    Enjoying Your Foldable Desk

    Congratulations! You've successfully built a foldable desk with storage. Enjoy the added desk space and organized storage. You can now keep your workspace neat and efficient. This DIY project allows you to showcase your creativity and have a piece of furniture that is tailored to your specific needs. So, sit back and appreciate the fruits of your labor â€" a beautiful, functional, and space-saving desk that's a testament to your craftsmanship!

    [Continue reading...]

    Sunday, November 10, 2024

    Diy handmade gun cabinet with a clean, modern look

    - 0 comments
    Diy handmade gun cabinet with a clean, modern look

    DIY Gun Cabinet: Modern Minimalism Meets Safe Storage

    Hey there, gun enthusiasts! If you're like me, you're always looking for ways to improve your home's aesthetics while keeping your firearms secure. A bulky, traditional gun cabinet just doesn't cut it anymore, especially when you're aiming for a modern, sleek look. So, let's dive into a DIY project that's going to blend safety with style! We're building a minimalist gun cabinet that's both functional and a statement piece.

    Planning Your Modern Masterpiece

    Before we get our hands dirty, let's sketch out the blueprint for our gun cabinet. This isn't just about throwing together some wood; it's about creating a space that's both practical and visually appealing.

    Size and Storage

    Think about your firearm collection. How many guns do you need to store? What about accessories like scopes, cleaning kits, and ammo? Measure the space where you plan to place the cabinet to determine its ideal dimensions. A good rule of thumb is to make it taller than it is wide, creating a more elegant silhouette.

    Design Elements

    Here's where your personal style shines! Do you envision clean lines and minimal hardware? Or perhaps a touch of industrial flair? Consider these design elements:

    • Door Style: Sliding doors create a seamless look, while hinged doors can offer more flexibility.
    • Hardware: Sleek, minimalist handles and hinges will complement the modern aesthetic.
    • Finish: A natural wood stain or a painted finish can add a touch of warmth or a bold pop of color.

    Materials: The Foundation of Your Cabinet

    Now that you have a clear vision, let's talk materials. We want our cabinet to be strong, durable, and easy to work with. Here's a suggested shopping list:

    • Plywood: Choose high-quality plywood for the cabinet's frame, shelves, and back panels.
    • Hardware: Don't forget the hinges, handles, and locking mechanisms.
    • Wood Glue: Use a strong wood glue to assemble the cabinet.
    • Wood Screws: Securely fasten the cabinet components using screws.
    • Finish: Choose a stain or paint that aligns with your design vision.
    • Safety Glass: To protect your valuable firearms and enhance the modern look, opt for tempered glass shelves.
    • Locking System: Invest in a reliable locking system that meets your security needs.

    Building Your Modern Masterpiece: Step by Step

    Alright, get your power tools ready! We're going to break down the construction process into manageable steps:

    1. Cutting the Pieces

    Carefully cut the plywood sheets according to your design measurements. Use a saw that provides precise cuts, and double-check your measurements before each cut.

    2. Assembling the Frame

    Start by constructing the cabinet frame using the plywood pieces. Use wood glue and screws to securely connect the pieces. For added strength, consider using corner brackets.

    3. Adding Shelves

    Now, it's time to create the shelves. Cut the plywood to the desired size, and attach them to the frame using glue and screws. Position the shelves at a height that accommodates your firearms.

    4. Installing the Back Panel

    Cut a plywood panel to fit the back of the cabinet. Use glue and screws to secure it to the frame.

    5. Adding Doors

    Depending on your door style, assemble them with plywood. If you're using sliding doors, make sure the tracks are mounted securely. Hinge doors should have strong hinges to prevent sagging.

    6. Installing the Locking System

    Choose a locking system that fits your security requirements. Install it according to the manufacturer's instructions.

    7. Finishing Touches

    Sand all the surfaces smooth to remove any rough edges. Apply your chosen stain or paint to achieve the desired look.

    8. Installation

    Secure the cabinet to the wall using heavy-duty anchors and screws. This will prevent accidental tipping and ensure the safety of your firearms.

    Finishing Touches: Adding That Extra Wow Factor

    Our minimalist gun cabinet is almost complete, but let's add a few final touches to make it truly exceptional.

    • Lighting: Consider adding a subtle LED strip light inside the cabinet for visibility. It'll enhance the modern feel and provide a soft glow to highlight your firearms.
    • Organization: Use small storage compartments or trays within the shelves to keep your accessories neatly organized.
    • Wall Décor: If the cabinet is positioned against a wall, consider adding minimalist wall décor like a simple geometric print or a modern metal sculpture to complement the clean lines of the cabinet.

    Final Thoughts: A Modern Sanctuary for Your Firearms

    Congratulations! You've successfully crafted a modern gun cabinet that blends security with style. It's a testament to your creativity and craftsmanship. And remember, your firearms are valuable investments. Now, you have a beautiful and secure home for them.

    If you're feeling adventurous, you can further personalize your cabinet. Add a touch of personalization, perhaps with a custom engraved plaque or a unique handle design that truly makes it your own.

    Happy building!

    [Continue reading...]

    Wooden gun cabinet building for beginners: easy how-to

    - 0 comments
    Wooden gun cabinet building for beginners: easy how-to

    Building a Wooden Gun Cabinet: A Beginner's Guide

    Protecting your firearms is paramount, and a sturdy, well-built gun cabinet is the ideal solution. This comprehensive guide will walk you through the process of constructing your own wooden gun cabinet, even if you're a novice woodworker. With detailed instructions, step-by-step explanations, and helpful tips, you'll be crafting a secure and stylish storage solution for your valuable firearms in no time.

    Planning Your Cabinet

    Before you dive into the construction, carefully plan your gun cabinet. Consider the following factors:

    Size and Dimensions

    Determine the number of firearms you need to store and choose dimensions accordingly. Measure the length, width, and depth of your firearms to ensure they fit comfortably within the cabinet.

    Style and Design

    Decide on the overall style and design of your cabinet. Do you prefer a traditional look or a modern aesthetic? Will you incorporate decorative elements like moldings or carvings? Consider the style of your home decor and the space where the cabinet will reside.

    Materials

    Choose high-quality materials that are durable and resistant to moisture. Plywood is an excellent choice for the cabinet sides, back, and shelves, offering strength and stability. For the doors, select solid wood like oak, maple, or cherry, as they provide a robust and attractive finish. Consider using 1/2-inch plywood for the sides and 3/4-inch plywood for the shelves and bottom.

    Gathering Tools and Materials

    To build your gun cabinet, you'll need the following tools and materials:

    Tools

    • Circular saw
    • Table saw or miter saw
    • Power drill
    • Screwdriver
    • Sandpaper (various grits)
    • Clamps
    • Level
    • Measuring tape
    • Pencil
    • Safety glasses
    • Ear protection

    Materials

    • Plywood (for sides, back, and shelves)
    • Solid wood (for doors)
    • Wood glue
    • Wood screws (various sizes)
    • Hinges (for doors)
    • Cabinet lock and hardware
    • Stain or paint (optional)
    • Polyurethane finish (optional)

    Building the Cabinet Body

    Now, it's time to construct the main body of your gun cabinet. This involves cutting the plywood panels and assembling the frame.

    Cutting the Panels

    Measure and cut the plywood panels for the sides, back, and bottom of your cabinet. Using a circular saw or table saw, cut the panels to your desired dimensions, ensuring precise measurements for a tight-fitting cabinet.

    Assembling the Frame

    Lay out the cut panels for the sides, back, and bottom on a flat surface. Use wood glue and screws to join the panels, creating the cabinet frame. Clamp the panels together while the glue dries, ensuring strong bonds.

    Creating the Shelves and Doors

    Once the cabinet frame is complete, you can add the shelves and construct the doors.

    Shelves

    Cut shelves from plywood to fit the width and depth of your cabinet. Measure and mark the shelf locations on the interior walls, ensuring even spacing. Attach the shelves to the walls using screws or shelf supports. Consider using adjustable shelf brackets for versatility.

    Doors

    Cut two identical doors from the solid wood you've chosen. You'll need a table saw or miter saw to create precise cuts for the door frame. Assemble the door frame with wood glue and screws, ensuring a strong and secure connection.

    Finishing Touches

    Once you've assembled your cabinet, it's time to enhance its appearance and durability. Consider sanding, staining, painting, and adding finishing touches.

    Sanding

    Sand the cabinet's exterior surfaces, including the doors and shelves, using various grits of sandpaper. Start with coarser grits to remove rough edges, then gradually move to finer grits for a smooth finish.

    Staining or Painting

    Apply a wood stain or paint to the cabinet to achieve your desired look. Choose colors that complement your home décor and personal preference. Apply the stain or paint in thin, even coats, allowing each layer to dry completely before applying the next.

    Finishing with Polyurethane

    For extra protection and a glossy sheen, apply a coat of polyurethane to the cabinet's exterior. Polyurethane creates a durable, water-resistant finish that will safeguard your cabinet from scratches and spills.

    Installation and Security

    After the finishing touches are complete, install the cabinet and secure your firearms. Consider these steps:

    Installation

    Choose a suitable location for your cabinet, ensuring it's level and stable. If necessary, use wall anchors or mounting brackets to secure the cabinet to the wall, especially if it's located in a high-traffic area.

    Security

    Install the cabinet lock and hardware, ensuring it's secure and tamper-proof. Consider adding a secondary security measure like a cable lock or alarm system to enhance the protection of your firearms.

    Conclusion

    Building your own wooden gun cabinet is a rewarding project that offers a sense of accomplishment and allows you to create a secure and stylish storage solution for your firearms. By following these steps, even beginners can craft a custom cabinet that meets their specific needs. Remember to prioritize safety and use caution throughout the construction process. With careful planning, meticulous execution, and a touch of creativity, you'll have a gun cabinet that you'll be proud to display and use for years to come.

    [Continue reading...]

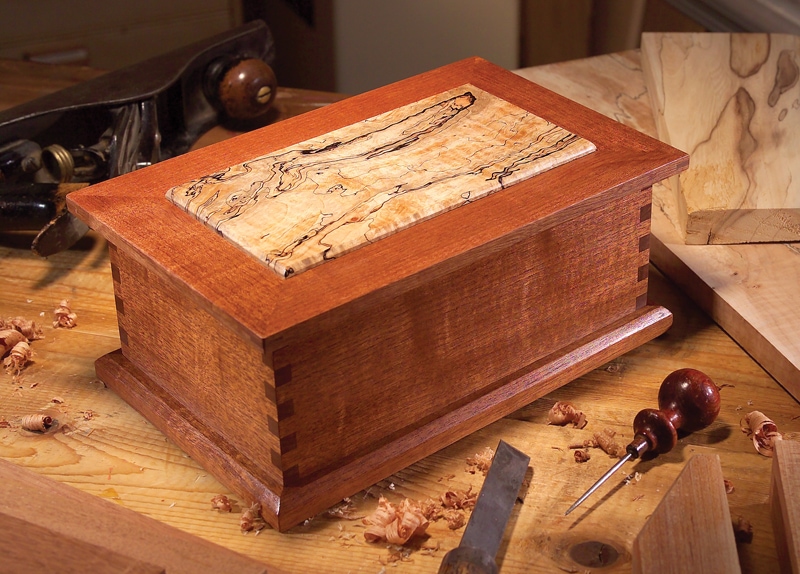
    Personalized diy magic box: woodworking gift idea

    - 0 comments
    Personalized diy magic box: woodworking gift idea

    Unleash Your Inner Craftsman: Building a Personalized Magic Box

    Are you looking for a truly unique and heartfelt gift to give someone special? Look no further than a personalized magic box! This DIY woodworking project lets you combine your love for crafting with the joy of creating something truly meaningful. With a little time and effort, you can build a beautiful and functional box that will be cherished for years to come.

    Choosing Your Magic Box Design

    The first step is deciding on the design of your magic box. Do you want a classic wooden box, a whimsical treasure chest, or something more modern? The possibilities are endless! Consider the recipient's personality and interests when selecting your design. A book lover might appreciate a box with a book-shaped lid, while a nature enthusiast could be delighted by a box adorned with wood-burned flora and fauna.

    Inspiration and Resources

    Don't be afraid to get creative! Browse online for woodworking plans, tutorials, and inspiration. Sites like Pinterest, Instructables, and Ana White offer a wealth of ideas. You can also visit your local library or craft store to find woodworking books and magazines. Remember, the most important thing is to create a box that reflects your love and care for the recipient.

    Gathering Your Materials and Tools

    Once you've chosen your design, you'll need to gather the necessary materials and tools. Here's a basic list:

    • Wood (pine, oak, or cherry are good choices for beginners)
    • Wood glue
    • Screws
    • Sandpaper (various grits)
    • Wood stain or paint (optional)
    • Finishing oil or wax (optional)
    • Saw (hand saw, jigsaw, or table saw)
    • Drill
    • Clamps
    • Measuring tape
    • Pencil
    • Safety glasses

    For a personalized touch, you can add decorative elements like hinges, locks, handles, or even engraved plates. Don't forget to wear safety gear when working with tools and wood.

    Crafting Your Magic Box

    Now for the fun part! Follow your chosen woodworking plan or tutorial carefully, taking your time and ensuring accurate cuts and measurements. Use strong wood glue to secure the joints, and reinforce them with screws. Sand the box thoroughly to create a smooth finish, and then apply a wood stain, paint, or a protective finish like oil or wax. This step is essential for protecting your box and enhancing its beauty.

    Adding Personal Touches

    To make your magic box truly special, consider incorporating personalized touches. You can add a custom-engraved plate with the recipient's name or a special message, decorate the box with pyrography (wood burning) designs, or paint a unique pattern that reflects their interests. Let your imagination run wild and make this box a true testament to your love and creativity!

    Filling Your Magic Box with Treasures

    Finally, it's time to fill your magic box with delightful surprises! Consider including a few of the recipient's favorite things, like a special book, a meaningful letter, or a small token of your affection. This personalized gift is more than just a box; it's a symbol of your care and thoughtfulness, a treasure to be cherished for years to come.

    Building a magic box is a rewarding experience, allowing you to connect with your creative side while crafting a unique and meaningful gift. So gather your tools, embrace your inner craftsman, and create a magic box that will leave a lasting impression on its lucky recipient.

    [Continue reading...]

    How to make a compact wood desk with built-in shelves

    - 0 comments
    How to make a compact wood desk with built-in shelves

    Building a Compact Wood Desk with Built-in Shelves: A DIY Guide

    Hey there, DIY enthusiasts! Are you tired of cramped spaces and overflowing clutter? Building a compact wood desk with built-in shelves can be a fantastic solution. Not only does it provide a dedicated workspace, but it also helps organize your belongings and keeps your space looking neat and tidy. Let's embark on this exciting woodworking adventure together!

    Planning Your Desk Design

    Before diving into the tools and materials, let's brainstorm your perfect desk design. This is your chance to personalize your workspace to fit your needs and style. Here are some key considerations:

    1. Dimensions and Functionality:

    What size will work best for your space? Consider how much workspace you need, and if you'd like to add a drawer or two. Remember, you want it to be compact but functional. Do you need a lot of shelf space for books or electronics? This will determine the depth and height of your shelves. Take measurements and sketch out a rough design on paper.

    2. Wood Choice:

    There's a world of wood to choose from, each with its own characteristics and price point. Here are a few popular choices:

    • Pine: Affordable and lightweight, but may be softer and prone to scratches.
    • Oak: Durable, strong, and aesthetically pleasing, but more expensive.
    • Maple: Hard, dense, and smooth, with a beautiful grain. It's a great choice for a desk surface.
    • Birch: Affordable and a good alternative to maple, with a slightly less pronounced grain.
    • Plywood: A versatile and budget-friendly option, offering strength and stability.

    Consider the weight and thickness of your chosen wood when determining the design and stability of your desk.

    3. Style and Finishing:

    Do you want a rustic, modern, or minimalist look? The wood type and stain or paint you choose will define the style. If you're going for a natural look, consider a clear sealant. A darker stain can create a more dramatic feel, while white or gray paint will provide a modern edge.

    Gathering Tools and Materials

    Now that you've got your design in mind, it's time to gather your tools and materials. Here's a typical list, but adjust it based on your specific design:

    • Wood: (Depending on your design, you may need: desk top boards, shelf boards, leg boards, support boards, back panel boards)
    • Wood glue
    • Wood screws
    • Wood filler
    • Sandpaper (various grits)
    • Stain or paint
    • Clear sealant
    • Tape measure
    • Pencil
    • Circular saw or miter saw
    • Drill
    • Clamps
    • Level
    • Safety goggles
    • Dust mask

    Before you start cutting, make sure your tools are sharp and in good working order. Safety first!

    Step-by-Step Construction

    Now for the exciting part â€" building your desk! Here's a general guide, but feel free to adapt it to your specific design.

    1. Cutting the Wood:

    Use your measurements and saw to cut all the wood pieces to the desired sizes. Remember to add a little extra for adjustments and sanding. Mark the cuts with a pencil to ensure accuracy.

    2. Assembling the Shelves:

    If your design includes shelves, start by assembling them. Cut the shelf supports to the correct length and attach them to the back panel using wood glue and screws. Add the shelf boards to the supports, ensuring they are level and flush.

    3. Building the Desk Legs and Support Structure:

    Attach the desk legs to the bottom of the desk top using wood glue and screws. You can also use corner braces for extra stability. For a more traditional look, consider adding a drawer or shelf underneath the desk top.

    4. Attaching the Shelves to the Desk:

    Once the legs and supports are in place, attach the shelf unit to the back of the desk. Use wood glue and screws, and ensure it's level and securely fastened.

    5. Finishing Touches:

    Fill any gaps or holes with wood filler and allow it to dry completely. Sand the entire desk surface, starting with rougher grit sandpaper and moving to finer grits for a smooth finish. Apply your chosen stain or paint in thin coats, allowing each coat to dry fully before applying the next. Finally, seal the surface with a clear coat for protection and enhanced durability.

    Tips and Tricks

    Here are a few tips and tricks to make your desk building journey even smoother:

    • Practice makes perfect: If you're new to woodworking, start with some practice cuts on scrap wood before cutting your final pieces.
    • Measure twice, cut once: Accuracy is key! Double-check your measurements before making any cuts. A tape measure and a sharp pencil are your best friends.
    • Use clamps: Clamp your pieces together while the wood glue dries to ensure a strong and stable bond.
    • Pre-drill holes: This will prevent the wood from splitting when you're driving in screws.
    • Sand carefully: A smooth and consistent sanding job will result in a beautiful finish. Pay attention to corners and edges.
    • Don't rush the process: Take your time and enjoy the process. A well-made desk will be a source of pride and satisfaction for years to come.

    Let's Get Creative!

    Remember, this is just a basic guide. Don't be afraid to experiment and personalize your design! Add your own touches with different wood types, hardware, or even a custom-designed drawer. The sky's the limit! With a little creativity and effort, you'll have a compact and functional wood desk that's perfectly tailored to your needs.

    Happy building!

    [Continue reading...]

    Friday, November 8, 2024

    How to build a wooden gun cabinet with locking glass doors

    - 0 comments
    How to build a wooden gun cabinet with locking glass doors


    A gun cabinet is an essential piece of furniture for any responsible gun owner. It provides a safe and secure environment for storing firearms, preventing unauthorized access and protecting them from the elements. This article guides you through the construction of a wooden gun cabinet with locking glass doors, ensuring a secure and aesthetically pleasing addition to your home.

    Materials:

    Wood: Choose a hardwood like oak, maple, or walnut for durability and aesthetics. Consider using 3/4-inch plywood for the cabinet sides and back, and solid wood for the face frame, doors, and shelves.
    Glass: Tempered glass is highly recommended for its safety and durability. Opt for ¼-inch thick glass for maximum strength.
    Hardware:
    Hinges: Select strong hinges designed for heavy doors. Concealed hinges offer a clean aesthetic.
    Locks: Choose high-quality, tamper-resistant locks with a deadbolt mechanism.
    Handles: Opt for sturdy handles that complement the cabinet style.
    Shelf Supports: Select adjustable metal shelf supports for versatility.
    Fasteners: Use screws, nails, and glue for secure assembly.
    Finishing Supplies:
    Wood Stain or Paint: Choose a suitable color and finish to complement your décor.
    Clear Coat: Apply a durable clear coat to protect the wood and enhance its beauty.
    Sandpaper: Use various grits for smoothing and finishing.
    Tools:
    Saw (Table Saw or Circular Saw)
    Router
    Drill
    Screwdriver
    Clamps
    Measuring Tape
    Level
    Pencil
    Safety Glasses and Gloves

    Step-by-Step Construction:

    1. Design and Planning:

    Determine the size and dimensions: Consider the number and size of firearms you wish to store. A standard cabinet size can range from 36 inches to 48 inches in height, 24 inches to 36 inches in width, and 12 inches to 18 inches in depth.
    Sketch a detailed plan: Include dimensions, shelf placement, door style, and lock placement.
    Choose a style: Consider a traditional or modern design that complements your décor.

    2. Building the Cabinet Box:

    Cut the plywood: Accurately cut the cabinet sides, back, and bottom using a saw. Ensure precise measurements for a perfect fit.
    Create the face frame: Cut solid wood pieces for the face frame and assemble them using glue and screws.
    Attach the face frame: Securely attach the face frame to the cabinet sides using screws.
    Assemble the cabinet box: Glue and screw the sides, back, and bottom together.
    Reinforce corners: Add corner blocks or gussets for additional stability.
    Add shelf supports: Attach adjustable metal shelf supports to the cabinet sides.

    3. Fabricating the Doors:

    Cut the glass: Measure and cut the glass to fit the door frames. Use a professional glass cutter or consult a glazier for accurate cutting.
    Create the door frames: Cut solid wood for the door frames and assemble them using glue and screws.
    Mount the glass: Install the glass into the door frames using glazing beads or rubber gasket material. Securely fasten the glass with screws or clips.
    Attach handles and locks: Carefully install the handles and locks to the doors, ensuring proper alignment and security.

    4. Finishing Touches:

    Sand the cabinet and doors: Smooth the surface of the cabinet and doors using sandpaper.
    Apply stain or paint: Choose a color and finish that matches your preferences.
    Apply clear coat: Protect the wood with a durable clear coat for a beautiful finish.
    Install the doors: Attach the hinges to the doors and cabinet, ensuring proper alignment.

    5. Additional Features:

    Lighting: Install interior lighting to illuminate the cabinet contents.
    Humidity Control: Consider adding a humidity control system for optimal storage conditions.
    Fireproofing: Incorporate fire-resistant materials or coatings for enhanced safety.
    Customizations: Add shelves, drawers, or compartments for additional storage options.

    Safety Considerations:

    Securely fasten all components: Ensure all screws, nails, and glue are properly installed for a robust and secure cabinet.
    Use tempered glass: Never use regular glass for the doors, as it can shatter dangerously.
    Choose high-quality locks: Opt for locks with deadbolt mechanisms and a tamper-resistant design.
    Store the key safely: Keep the key in a secure location, separate from the cabinet.
    Follow local gun storage regulations: Familiarize yourself with local laws regarding firearm storage and ensure your cabinet complies with all requirements.

    Conclusion:

    Building a wooden gun cabinet with locking glass doors is a rewarding project that allows you to create a secure and stylish storage solution for your firearms. By carefully following these steps and incorporating safety considerations, you can ensure the cabinet provides optimal protection and peace of mind. Remember to choose high-quality materials and invest time in careful craftsmanship for a lasting and reliable storage solution.

    [Continue reading...]

    Diy wooden gun box with a custom foam interior for protection

    - 0 comments
    Diy wooden gun box with a custom foam interior for protection

    Alright, folks, let's talk about protecting your precious firearms! Nothing beats a good, sturdy wooden gun box. They're not just for looks â€" they add a touch of class to your collection and keep your guns safe and secure. But we're not stopping at a simple box, we're going all-out, with a custom foam interior that's designed to cradle your guns like a baby.

    This DIY project isn't rocket science, but it does require some patience and attention to detail. Think of it as a personalized, love letter to your guns. You'll be surprised at how much you can accomplish with some basic tools and a little bit of know-how.

    Step 1: Choosing Your Wood and Design

    The first step is choosing your wood. You can go with a traditional solid hardwood like walnut, oak, or cherry for a classic look. If you're feeling adventurous, try something unique like maple or even reclaimed wood for a rustic touch. The choice is yours!

    Now, let's talk about the box's design. We're aiming for a simple, functional design here. A rectangular box with a hinged lid is a great starting point. You can add some extra flair with a decorative trim or a couple of stylish brass hinges.

    Step 2: Cutting and Assembling the Box

    Get your trusty saw, measuring tape, and a pencil. You'll need to cut the wood into precise pieces for the base, sides, lid, and any additional decorative elements. Remember to account for the thickness of the wood when calculating the measurements.

    Now, it's time to assemble the box. You can use either traditional wood joints like dovetails or mortise and tenon, or opt for a simpler approach with wood glue and screws. Just make sure to clamp the pieces together securely while the glue dries.

    Step 3: Adding the Finishing Touches

    Once the box is assembled, give it a light sanding to smooth out any rough edges. You can then apply a finish of your choice, like a clear varnish or a stain, to protect the wood and enhance its natural beauty.

    Step 4: Designing and Cutting the Foam

    This is where the magic happens! We're going to create a custom foam interior that perfectly fits your guns and protects them from scratches and bumps. You'll need a high-density foam sheet, a cutting mat, a utility knife, and some patience.

    Start by measuring your guns and sketching out a layout on the foam sheet. You'll need to create separate compartments for each gun, with a snug fit but enough space for easy removal. Don't forget to include some extra space around the barrels for added protection.

    Now, the exciting part â€" cutting the foam. Start with the outer edges, cutting slowly and carefully to avoid jagged edges. Then, create individual slots for each gun, making sure they're just wide enough to accommodate your guns. Remember to leave some extra foam for a snug fit.

    Step 5: Finishing and Installing the Foam

    Once you've cut the foam, smooth out any rough edges with a utility knife or a sanding block. You can also use a heat gun to slightly melt and smooth the edges if desired.

    Finally, it's time to secure the foam inside your gun box. You can use a strong adhesive spray or a combination of glue and strategically placed foam tape. Make sure the foam fits snugly inside the box and that your guns sit securely in their designated compartments.

    Extra Tips:

    Consider adding a lock to your gun box for added security. You can install a simple hasp and padlock, or go for a more elaborate locking mechanism.
    Use a heat gun to lightly melt the foam around the edges to create a smooth and finished look.
    Add a layer of felt or fabric to the bottom of the box to add a luxurious touch and prevent your guns from scratching the bottom.
    Customize your foam with your initials or a logo for a personalized touch.
    If you're not confident cutting foam yourself, there are numerous online resources and tutorials available to help you.

    Safety First:

    Remember, firearms are serious tools and should be handled with care. Always keep them unloaded and in a safe place, and follow all local laws and regulations.

    The Joy of Creating

    Building your own wooden gun box with a custom foam interior is a rewarding experience. You'll have the satisfaction of creating a unique and protective storage solution for your precious guns, while showcasing your woodworking skills. So, gather your tools, embrace the process, and enjoy the journey of creating something special.

    [Continue reading...]

    Thursday, November 7, 2024

    Create a diy wooden magic box in simple steps

    - 0 comments
    Create a diy wooden magic box in simple steps

    Alright, folks, gather around! Today we're going to make a wooden magic box. Not the kind that pulls rabbits out of a hat, but one that's full of wonder and a little bit of DIY magic. Trust me, even if your carpentry skills are about as sharp as a butter knife, you can do this.

    Step 1: Gathering Your Gear

    First things first, we need to gather our tools and materials. You'll need:

    Wood: We're going for a classic look, so grab some pine or poplar. You can get pre-cut boards at your local hardware store. You'll need:
    Four pieces of wood, 12 inches long and 1 inch wide, for the sides.
    Two pieces of wood, 12 inches long and 1 inch wide, for the top and bottom.
    Two pieces of wood, 1 inch long and 1 inch wide, for the hinges.
    Tools:
    A saw (hand saw or circular saw)
    A hammer
    A screwdriver
    A drill
    Sandpaper (different grits)
    A measuring tape
    Wood glue
    Screws (1-inch long)
    Hinges (small, decorative ones are perfect)
    A paintbrush (optional)
    Your favorite stain or paint (optional)

    Step 2: Crafting the Box

    Let's get this woodworking party started!

    1. Cutting the Pieces: Using your saw, cut the wood pieces to their designated sizes. Be sure to cut the hinge pieces at a 45-degree angle.
    2. Sanding the Edges: Now, we're going for a smooth, polished look. Sand all the edges of your wood pieces with sandpaper. Start with a rougher grit and move to a finer one for a smooth finish.
    3. Assembling the Box: Lay your bottom piece flat. Then, place the side pieces on top, standing them up like little wooden walls. Using your wood glue and screws, secure the sides to the bottom. Repeat on the other side.
    4. Adding the Top: Time for the lid. Place the top piece on top of the box, aligning it with the edges. Secure it with wood glue and screws just like the sides.
    5. Attaching the Hinges: Now, take those cleverly cut hinge pieces. Glue them to the top and bottom of the box where you want the lid to open. Then, attach your decorative hinges to the hinge pieces, ensuring the lid opens smoothly.

    Step 3: Personalizing Your Magic Box

    Okay, the box is built! Now, it's time to make it your own. Here's where the magic happens:

    1. Adding Charm: Think about what you want your magic box to be. Maybe you want it to be a treasure box for trinkets or a place to keep special letters. Maybe it's a magical portal to a secret world!
    2. Decorating: Now it's time to dress up your box. You can paint it a vibrant color or stain it for a rich, natural look. Feel free to get creative!
    3. Adding Details: Make your magic box even more magical! Add some embellishments:
    Buttons: Attach some buttons to the lid for a whimsical touch.
    Beads: String beads and attach them around the box for a touch of sparkle.
    Embroidery: Get out your needle and thread and add some embroidery to the lid for a personalized touch.

    Step 4: Filling it with Wonder

    Now, the final step! What's going inside your magic box? This is the part where your imagination runs wild.

    Hidden Treasures: Fill it with precious trinkets, special memories, or things that make you feel happy.
    Secret Messages: Write down your dreams, wishes, or even your deepest secrets and tuck them inside.
    Magical Objects: Collect things that spark your imagination - feathers, shells, crystals, whatever speaks to you.

    Voila! Your magical wooden box is ready to be filled with wonder and kept in a place where you can find a little bit of magic every day.

    A Few Final Tips:

    Safety First: When using power tools, always wear safety glasses and use caution.
    Measure Twice, Cut Once: You'll save yourself some frustration if you get your measurements right the first time.
    Embrace Imperfections: Your box doesn't need to be perfect. In fact, its imperfections might add to its charm and tell a story of your DIY adventure.

    So there you have it! Now go forth and create your own magical wooden box. It's a reminder that magic can be found in the simplest things, like creating something beautiful with your own hands. Happy crafting!

    [Continue reading...]

    Simple steps to building a diy woodworking magic box

    - 0 comments
    Simple steps to building a diy woodworking magic box

    Hey there, fellow woodworkers! Ready to add some magic to your next project? Today, we're diving into the world of DIY magic boxes.

    These little beauties are more than just a decorative piece; they're a gateway to endless possibilities! Imagine a box that seemingly produces endless scarves, a box that reveals hidden treasures, or even a box that magically changes its appearance!

    Now, before we start conjuring up spells and potions, let's break down the process into simple steps:

    Step 1: The Big Picture â€" Choosing Your Magic

    First things first, we need to decide on the magic we're going to perform!

    The Classic "Vanishing" Box: This is the most basic type. You'll create a box that appears to have a secret compartment, making objects vanish and reappear. Think about how you want this to work. Will you have a sliding panel, a hidden drawer, or maybe even a secret door?
    The "Endless" Box: This one is a real crowd-pleaser. You'll create a box that seemingly produces an endless stream of items, like scarves, flags, or even playing cards. Imagine the look on people's faces when they can't fathom how the box keeps producing new things!
    The "Transforming" Box: Get creative with this one! You could design a box that magically changes its appearance, revealing a different pattern, color, or even a completely new design. This one might involve a bit more intricate crafting, but the reward is worth it!

    Step 2: Gathering Your Supplies

    Now, it's time to gather your tools and materials. Here's a basic list:

    Wood: Choose a wood that's sturdy and easy to work with. Pine, plywood, and hardwood like maple or cherry are all excellent options.
    Saw: A hand saw, jigsaw, or circular saw will be your best friend for cutting the wood.
    Measuring Tape and Pencil: These are essential for making accurate cuts and ensuring everything lines up perfectly.
    Screwdriver: You'll need this to secure the box's components.
    Wood Glue: Strong wood glue will ensure your box stays together.
    Sandpaper: Smooth those edges and give your box a professional finish.
    Paint or Stain: Time to give your box a personality! Choose a paint or stain that reflects the magic you want to create.
    Hardware: Depending on your chosen magic, you'll need hinges, magnets, or even small gears and pulleys.

    Step 3: Building the Box

    Alright, let's get those hands dirty and start building!

    Planning the Design: Draw a plan of your box on paper, including the dimensions and any special features like secret compartments, doors, or drawers.
    Cutting the Wood: Using your saw, carefully cut the wood according to your design. Remember, precise cuts are key to making a smooth and functional box.
    Assembling the Box: Glue and screw the pieces together, making sure they fit snugly and securely. Let the glue dry completely before moving on to the next step.
    Adding Special Features: Now it's time to install those secret compartments, hinges, or other magical components. Pay close attention to your design and make sure everything is in the right place and secured properly.

    Step 4: The Magic Touch

    With the box assembled, it's time to add that touch of magic.

    Sanding and Finishing: Sand the surface of your box smooth and remove any sharp edges. Then, apply your chosen paint or stain. You could even add decorative details like stencils, patterns, or even a coat of varnish for extra shine.
    Incorporating the Magic: This is where your creativity really shines! For a vanishing box, you might design a sliding panel that reveals a hidden space. For an endless box, you'll need a mechanism to release objects, perhaps a system of pulleys or a rotating compartment. For a transforming box, maybe you'll use a hidden latch that flips the box inside out, revealing a different side.

    Step 5: The Big Reveal

    It's time to reveal your masterpiece to the world!

    Practicing the Trick: Take some time to practice your chosen magic trick. You want to make it smooth and believable.
    Showmanship: The magic isn't just in the box; it's also in the way you present it. Use your voice, facial expressions, and gestures to add to the wonder.
    Enjoy the Magic: The best part of building a magic box is seeing the amazement on people's faces.

    Extra Tips for Building a Great Magic Box:

    Keep it Simple: Start with a basic design and gradually add more complex features as you gain confidence.
    Don't be Afraid to Experiment: Try different techniques, materials, and designs. The possibilities are endless!
    Have Fun! Woodworking should be enjoyable, so let your imagination run wild and create something truly magical!

    Remember, building a magic box is about more than just carpentry skills; it's about tapping into your creativity and using your hands to bring magic to life. So gather your materials, put on your thinking cap, and get ready to wow your friends and family with your amazing DIY magic boxes!

    [Continue reading...]

    Build a wooden jewelry box to store your precious items

    - 0 comments
    Build a wooden jewelry box to store your precious items

    Okay, so you’ve got all these beautiful pieces of jewelry, and they’re just sitting around, getting tangled up in a drawer, or maybe even worse, just thrown in a pile. It’s time to give them the respect they deserve! We’re talking about a handmade wooden jewelry box.

    It’s a project that’s totally doable, even if you’re not the most experienced woodworker. And it’s way more rewarding than buying one from the store. You get to choose the wood, the design, the size, and personalize it with your own touch. Plus, it’s a great way to practice your woodworking skills and create something truly unique.

    Let's dive in, shall we?

    Step 1: Gather Your Supplies

    First things first, let’s get our supplies together. You’ll need:

    Wood: Choose something nice and sturdy, like maple, cherry, walnut, or even pine. Just avoid anything too soft, as you’ll be drilling and cutting into it.
    Tools: A jigsaw, a drill, a hammer, sandpaper, wood glue, a tape measure, a pencil, and clamps.
    Hardware: Hinges (two sets, one for each side), a lock and key, a latch, and some screws.
    Finishing Supplies: Wood stain, wood sealer, and a brush.

    Step 2: Designing Your Jewelry Box

    Okay, now comes the fun part â€" designing your jewelry box! Think about what you want it to look like.

    Shape: Traditional rectangle? Fancy octagon? Maybe even a heart-shaped box for all your romantic jewelry!
    Size: How much jewelry do you need to store? Make it big enough for everything, but not so big that it takes up too much space.
    Details: Do you want compartments, drawers, or maybe a little mirror inside?

    I like to sketch out a few different ideas on paper first, just to get a feel for what I want to do.

    Step 3: Cutting and Shaping

    Time to break out the power tools!

    Cut the wood: Use your jigsaw to cut the pieces of wood to the sizes you’ve determined from your design. Be sure to make your measurements twice and cut once! No one likes a box with lopsided sides.
    Shape the wood: If you want fancy curves or rounded corners, this is where you’ll use your sandpaper and your patience to smooth out those edges.

    Step 4: Assembling Your Box

    Now it’s time to build your masterpiece.

    Glue and Clamp: Apply wood glue to the edges of your box pieces, then use clamps to hold them together firmly while the glue dries. You’ll want to make sure the corners are nice and tight.
    Drilling for Hinges: Once the box is assembled, carefully drill pilot holes for your hinges on both sides. This will prevent the wood from splitting when you screw them in.
    Attaching the Hinges: Attach your hinges using the screws provided. Make sure they’re aligned perfectly so the lid opens and closes smoothly.
    Installing the Lock and Latch: Drill pilot holes for the lock and latch, then attach them securely.

    Step 5: Adding a Little Finishing Touches

    We’re almost done! Now it’s time to give your jewelry box some personality.

    Sanding: Sand the entire surface of the box smooth, starting with a coarser grit and finishing with a finer grit for a smooth, professional look.
    Staining: If you’re using wood stain, apply it evenly with a brush and let it dry thoroughly. If you’re going for a natural look, you can skip this step.
    Sealing: Protect your box from scratches and spills with a layer of wood sealer. This will also help to enhance the beauty of your chosen wood.

    Step 6: Adding Interior Details

    This is your chance to get creative and customize your box to your heart’s content.

    Compartments: Create compartments inside the box using thin pieces of wood or even cardboard. You can even add dividers to make it easier to organize your jewelry.
    Drawers: Build small drawers to house your larger jewelry items.
    Mirror: Add a small mirror inside the lid for easier viewing.

    Step 7: The Big Reveal!

    And there you have it! Your very own, handmade wooden jewelry box. It’s ready to hold your most prized possessions, adding a touch of elegance and craftsmanship to your space.

    Here are some tips to make your jewelry box truly unique:

    Inlay: Create beautiful patterns by using different types of wood or other materials like mother of pearl, shell, or even metal.
    Carving: Add some decorative carvings to the box, such as a vine pattern, a floral motif, or even your initials.
    Painting: If you’re not a fan of staining, paint your box in your favorite color, or use a decoupage technique to create a unique design.

    Beyond the Basics: Going the Extra Mile

    Feeling adventurous? Here are some ideas to elevate your jewelry box game:

    Secret Compartment: Add a hidden compartment within the box to stash your most valuable items.
    Light Up: Install a small LED light inside the box for a dramatic effect.
    Rotary Mechanism: Create a hidden compartment with a rotating mechanism, adding a fun element of surprise.

    And now, the most important step...

    Enjoy your creation!

    Making a wooden jewelry box is a project that you can personalize to reflect your own style and preferences. It’s not just about the box itself, it’s about the process of creating something beautiful and unique with your own two hands.

    So go ahead, gather your supplies, and start building! You’ll be surprised at what you can achieve.

    [Continue reading...]

    Wednesday, November 6, 2024

    Contemporary woodworking plans

    - 0 comments
    Contemporary woodworking plans 1
    Contemporary woodworking plans 2


    Looking to bring a modern touch to your home decor? Contemporary woodworking offers a fantastic way to blend function and form, creating stylish and unique pieces that reflect your personal style.

    Embrace Simplicity & Clean Lines: Contemporary woodworking emphasizes clean lines, minimal ornamentation, and a focus on natural materials. Think sleek coffee tables with geometric legs, open shelving units that showcase your belongings, and elegant floating shelves that add visual interest without clutter.

    Go Beyond the Basics: Don't be afraid to experiment with unconventional shapes and unexpected materials. Consider incorporating reclaimed wood for a rustic-modern vibe, or explore the versatility of plywood to create intricate geometric designs.

    DIY Delights: Many contemporary woodworking projects are surprisingly achievable for beginners.

    Floating Shelves: A simple yet impactful project that adds storage and style.
    Geometric Side Table: Embrace geometric shapes with a minimalist design.
    Modern Wall Art: Create eye-catching pieces using wood and geometric patterns.

    Finding the Right Plans:

    Online Resources: Websites like Pinterest, Instructables, and Ana White offer a wealth of contemporary woodworking plans.
    Woodworking Magazines: Magazines like "Fine Woodworking" and "Popular Woodworking" often feature modern projects.
    Local Woodworking Classes: Enroll in a class to learn new techniques and get personalized guidance.

    Remember:

    Safety First: Always prioritize safety by using proper tools and techniques.
    Plan Ahead: Sketch out your project, calculate material needs, and carefully select your wood.
    Finishing Touches: Don't neglect the finishing process. A clear coat or stain can enhance the beauty of your wood and protect it from wear.

    Contemporary woodworking is a rewarding and creative pursuit. By embracing simplicity, exploring new materials, and diving into the world of DIY, you can transform your home with pieces that are both functional and visually stunning.

    [Continue reading...]

    Building an adirondack chair with armrests: a complete guide

    - 0 comments

    Building an adirondack chair with armrests: a complete guide 2


    The Adirondack chair, a symbol of outdoor relaxation, can be a rewarding DIY project. This guide will help you construct a comfortable chair with armrests, perfect for enjoying your backyard haven.

    Materials You'll Need:

    Lumber: 2x4s for the frame and legs, 1x6s for the seat and back slats. Choose durable, weather-resistant wood like cedar or pressure-treated pine.
    Wood screws: 2 1/2" and 3" long for assembly.
    Wood glue: For extra strength.
    Safety glasses: Protect your eyes during cutting and sanding.
    Saw: A circular saw or miter saw will make cutting easier.
    Drill: For pre-drilling holes before screwing.
    Sandpaper: To smooth out rough edges.
    Finishing (optional): Wood stain or paint for added protection and a personalized touch.

    Steps:

    1. Cut the pieces: Refer to a detailed plan or online diagrams for the exact dimensions. A miter saw will provide precise cuts, especially for the angles on the seat and back.
    2. Assemble the frame: Start by creating the seat, joining the two long frame pieces with screws and glue. Add the front and back legs, ensuring they're square and sturdy.
    3. Attach the seat slats: Position the slats across the seat frame, leaving small gaps for drainage. Pre-drill holes to prevent splitting and secure with screws.
    4. Build the back: Attach the back support pieces to the top of the legs, forming the angle of the backrest. Add the back slats in a similar way to the seat.
    5. Construct the armrests: Cut the armrest supports and attach them to the frame, ensuring they're level with the seat. Add the slats to complete the armrests.
    6. Finish and enjoy: Sand the chair thoroughly to create a smooth surface. Apply stain or paint, letting it dry completely before use.

    Tips for a Successful Build:

    Choose quality lumber: This will ensure durability and long-lasting enjoyment.
    Use a plan: Accurately measured diagrams will simplify the building process.
    Pre-drill holes: This prevents splitting and makes assembly easier.
    Be patient and take your time: Careful work will result in a beautifully built chair.

    Building your own Adirondack chair with armrests is a rewarding experience that allows you to enjoy the fruits of your labor while soaking up the sunshine. With this guide and a little dedication, you'll have a comfortable and stylish chair that will last for years to come.

    [Continue reading...]

    How to build a tall planter box for growing tall plants and shrubs

    - 0 comments
    How to build a tall planter box for growing tall plants and shrubs 1
    How to build a tall planter box for growing tall plants and shrubs 2


    Craving a touch of vertical greenery but lack the space for a sprawling garden? A tall planter box is the perfect solution, offering an elegant way to cultivate towering plants and shrubs in limited areas. Here's how to build your own:

    1. Choose Your Materials:

    Wood: Cedar, redwood, and treated lumber are excellent choices, offering durability and natural beauty.
    Planter Size: Determine the height, width, and depth you need to accommodate your chosen plants. Consider the root system and growth habit of your plants.
    Drainage: Essential for healthy plant growth. Incorporate drainage holes at the bottom of the planter.

    2. Build the Structure:

    Base: Start with the bottom of the planter, cutting and joining four planks to form a square or rectangle.
    Sides: Construct the sides by cutting and securing four planks to the base.
    Support: For taller planters, consider adding extra support beams inside the box for stability.

    3. Add Drainage and Finishing Touches:

    Drainage Holes: Drill holes in the bottom of the planter for water runoff.
    Lining: If using wood, consider lining the planter with landscaping fabric to prevent water damage.
    Finishing: Paint or stain the planter to enhance its aesthetic appeal and protect the wood.

    4. Planting Time:

    Choose Plants: Select plants that thrive in containers and can handle the height of your planter.
    Soil Mix: Use a high-quality potting mix designed for container planting.
    Watering: Water your plants regularly, ensuring the soil remains moist but not soggy.

    Tips for a Successful Tall Planter:

    Consider weight: Tall planters can become heavy, so choose a sturdy base and location.
    Access: Ensure you can easily reach the top of the planter for watering and maintenance.
    Aesthetic Appeal: Combine different plant textures and colors to create visual interest.
    Protection: Cover your planter during harsh weather conditions to protect your plants.

    By following these steps, you can create a beautiful and functional tall planter box that will enhance your space and provide a home for your magnificent plants. Remember to choose plants suited for container growing and provide them with the proper care for a thriving, vertical oasis.

    [Continue reading...]

    How to build a planter box for outdoor use: tips for durability

    - 0 comments
    How to build a planter box for outdoor use: tips for durability 1
    How to build a planter box for outdoor use: tips for durability 2


    Want to add a touch of greenery and personality to your outdoor space? Building a planter box is a rewarding DIY project that can be customized to your style and needs. But for a planter that stands the test of time, durability is key. Here are some tips to ensure your planter box withstands the elements and looks great for years to come:

    1. Choose the Right Materials:

    Wood: Cedar, redwood, and pressure-treated pine are naturally resistant to rot and decay.
    Composite: Low-maintenance and durable, composites are a good option for busy gardeners.
    Metal: Galvanized steel or aluminum are sturdy and long-lasting, but can heat up in direct sunlight.
    Plastic: Lightweight and affordable, but might not be as aesthetically pleasing or as long-lasting.

    2. Build a Sturdy Frame:

    Strong Joints: Utilize mortise and tenon joints, pocket holes, or strong glue for lasting connections.
    Reinforced Corners: Add corner braces or use extra-thick boards to prevent warping.
    Proper Spacing: Ensure adequate spacing for drainage holes and ventilation.

    3. Protect Your Planter:

    Waterproofing: Apply a sealant or paint to prevent water damage and prolong the life of your planter.
    Stain or Paint: Use a high-quality wood stain or paint that is specifically formulated for outdoor use.
    Drainage: Include drainage holes to prevent waterlogging and root rot.

    4. Consider the Location:

    Sunlight Exposure: Choose materials that can withstand direct sunlight and heat.
    Moisture Levels: Consider the amount of moisture in the environment and select materials that can handle it.
    Accessibility: Ensure your planter is easy to access for watering and maintenance.

    5. Add Finishing Touches:

    Optional Features: Consider adding wheels for easy mobility, trellis panels for climbing plants, or decorative accents.
    Planter Liners: Use a landscape fabric or plastic liner to prevent soil from escaping and to aid in drainage.

    Bonus Tip: Don't forget to choose the right potting mix for your plants.

    By following these tips, you can build a durable and aesthetically pleasing planter box that will enhance your outdoor space for years to come. Enjoy the process, get creative, and let your green thumb shine!

    [Continue reading...]

    Building a cedar planter box: a complete guide for beginners

    - 0 comments
    Building a cedar planter box: a complete guide for beginners 1


    Looking to elevate your outdoor space with a touch of natural elegance? Building a cedar planter box is an excellent DIY project for beginners! Cedar wood offers durability, natural pest resistance, and a beautiful aromatic scent. Let’s get you started:

    Building a cedar planter box: a complete guide for beginners 2


    1. Planning Your Planter Box:

    Size matters: Determine the dimensions of your planter based on the plants you’ll be housing.
    Shape and style: Consider a rectangular, square, or even a curved shape for a unique touch.
    Materials: You'll need cedar boards, screws, a drill, and a measuring tape.
    Drainage: Add drainage holes at the bottom to prevent root rot.

    2. Cutting and Assembling:

    Precise cuts: Use a saw to cut the cedar boards according to your measurements.
    Join the sides: Secure the sides of the planter box using screws. For extra sturdiness, consider using wood glue.
    Construct the base: Attach the base to the sides, leaving a slight overhang to create a ledge for your plants.
    Adding a finishing touch: Sand the edges of the planter for a smooth finish and apply a sealant to protect the wood.

    3. Planting and Maintenance:

    Choose your plants: Select plants that thrive in your climate and match the size of your planter.
    Add soil and plants: Fill the planter with high-quality potting mix, leaving a few inches from the top. Carefully plant your chosen flora.
    Watering and care: Regular watering is essential. Adjust the frequency based on your plants' needs and the weather.

    Bonus Tips:

    Personalize your planter: Paint or stain it to match your outdoor décor.
    Elevated design: Build legs for your planter to create a raised garden bed.
    Creative combinations: Pair multiple planter boxes together for a stunning visual impact.

    Building a cedar planter box is a rewarding project that can transform your outdoor space. Enjoy the process, embrace the beauty of cedar wood, and watch your green oasis flourish!

    [Continue reading...]

    Building a reclaimed wood adirondack chair: a diy guide

    - 0 comments

    Building a reclaimed wood adirondack chair: a diy guide 2


    Looking for a unique, eco-friendly, and stylish addition to your outdoor space? Building a reclaimed wood Adirondack chair is the perfect project! Not only will you save money, but you'll also create a piece of furniture with a story, adding character and personality to your porch or patio.

    Materials you'll need:

    Reclaimed wood: Look for sturdy, 2x4 or 2x6 boards. You can source them from demolition sites, salvage yards, or even repurpose old furniture.
    Wood screws: Choose screws that are long enough to penetrate the wood without splitting.
    Wood glue: For added strength and stability.
    Sandpaper: To smooth out rough edges and surfaces.
    Wood stain or paint: To protect and enhance the natural beauty of your wood.
    Measuring tape and pencil: For marking and cutting.
    Circular saw or jigsaw: For precise cutting.
    Drill: For pre-drilling holes before screwing.
    Clamps: To hold pieces together while gluing.

    Step-by-step guide:

    1. Plan your design: Choose a detailed plan or use an online guide for specific dimensions.
    2. Prepare your reclaimed wood: Clean and inspect the wood, ensuring it's free from pests or rot.
    3. Cut the wood: Use your saw to carefully cut the wood according to your chosen plan.
    4. Assemble the chair: Starting with the seat frame, connect the pieces using wood glue and screws. Secure each joint with clamps.
    5. Add the back and arms: Once the base is solid, attach the backrest and armrests.
    6. Sand and finish: After assembly, sand the chair thoroughly to create a smooth finish. Apply your chosen stain or paint.

    Tips for using reclaimed wood:

    Inspect for imperfections: Reclaimed wood may have knots, cracks, or nail holes, so ensure your plan accounts for these features.
    Use longer screws: To compensate for the potential variability of the wood.
    Embrace the imperfections: Unique features are part of reclaimed wood's charm.

    Enjoy your creation:

    Your handcrafted Adirondack chair is a testament to your DIY skills and environmental consciousness. Relax, unwind, and admire your unique piece of furniture.

    Bonus tip: Consider building a matching set of chairs or a coffee table to create a cohesive and personalized outdoor space.

    Building a reclaimed wood Adirondack chair is a rewarding and fun project. With careful planning and a bit of patience, you can create a unique and beautiful piece of furniture that will be enjoyed for years to come.

    [Continue reading...]

    Diy adirondack chair with unique finishes: personalize your outdoor furniture

    - 0 comments
    Diy adirondack chair with unique finishes: personalize your outdoor furniture 1
    Diy adirondack chair with unique finishes: personalize your outdoor furniture 2


    Adirondack chairs are synonymous with relaxed outdoor living. But why settle for a generic design when you can create a truly unique piece that reflects your personal style? Embark on a DIY adventure and transform your Adirondack chair from ordinary to extraordinary with these unique finishing touches.

    Embrace the Rustic Charm:

    Reclaimed Wood: Give your chair a story by using salvaged wood from old barns, pallets, or even weathered fences. The natural imperfections and variations in grain add character and a touch of nostalgia.
    Driftwood: For a truly coastal vibe, incorporate driftwood into the design. Use it for accents like armrests or the chair's back, or even create a unique base from interwoven driftwood pieces.
    Natural Finishes: Highlight the wood's natural beauty with a clear oil or wax finish. These protect the wood while letting its grain and texture shine.

    Go Bold with Color and Texture:

    Painted Accents: Break up a traditional wood finish with pops of vibrant color. Paint the chair's slats in contrasting hues or create a geometric pattern with stripes or polka dots.
    Stencils: Add a touch of elegance with stencils. Create intricate designs on the chair's back or armrests, or incorporate your favorite quotes or images.
    Textile Upholstery: For added comfort and style, upholster the chair's seat and back with fabric. Choose a weather-resistant material like outdoor canvas, marine-grade vinyl, or even recycled fabrics.

    Creative and Functional Touches:

    Built-in Storage: Add hidden compartments to the chair's back or seat for storing essentials like a book, phone, or snacks.
    Integrated Drink Holders: Carve or attach cup holders into the armrests for easy access to your favorite beverage.
    LED Lighting: Add a touch of ambiance by installing LED strip lights underneath the chair's slats or in the back. They create a warm glow and add a unique visual element at night.

    Remember, the possibilities are endless! Let your creativity guide you as you transform your DIY Adirondack chair into a personalized masterpiece that reflects your unique style and enhances your outdoor space. Enjoy the process and the satisfaction of creating something truly special!

    [Continue reading...]

    Building a modern adirondack chair: tips and tricks

    - 0 comments

    Building a modern adirondack chair: tips and tricks 2


    The Adirondack chair, a timeless symbol of relaxation, is enjoying a modern revival. But don't settle for the classic design. With these tips and tricks, you can craft a sleek and comfortable Adirondack chair that reflects your personal style.

    1. Choose the Right Materials:

    Modern Wood: For a contemporary look, go beyond traditional cedar. Explore hardwoods like walnut, maple, or cherry. Their rich grain and natural oils will add character.
    Metal & Composites: Embrace the trend of using metal accents, like stainless steel or aluminum, for a touch of industrial chic. Consider composite decking materials for durability and weather resistance.

    2. Streamline the Design:

    Simplified Lines: Cut away the overly chunky look of traditional Adirondacks. Opt for slimmer armrests, legs, and back slats.
    Sleek Curves: Introduce gentle curves to the back and seat to provide ergonomic support and enhance the visual appeal.
    Unique Angles: Experiment with different angles for the backrest and seat to create a more modern and comfortable experience.

    3. Enhance Comfort & Functionality:

    Adjustable Backrest: Consider incorporating an adjustable backrest for ultimate relaxation. Use metal hinges or a simple sliding mechanism for easy adjustment.
    Cushioned Seat: Add a stylish and comfortable cushion for extra support and personalization. Choose weather-resistant fabrics or incorporate a removable cushion cover for easy cleaning.
    Armrest Storage: Integrate storage compartments into the armrests for holding beverages, magazines, or other essentials.

    4. Add a Personal Touch:

    Unique Finishes: Embrace modern staining techniques like color washes or distressed finishes to enhance the wood's natural beauty. Metal accents can be powder coated or anodized for vibrant color options.
    Customizable Features: Incorporate personalized touches like laser-etched names, logos, or decorative elements.
    Matching Set: Craft a matching set of chairs, footstools, or side tables to create a cohesive outdoor living space.

    Building a modern Adirondack chair is a rewarding project that combines style, comfort, and functionality. With these tips and tricks, you can create a statement piece that will be enjoyed for years to come.

    [Continue reading...]

    Diy adirondack chair: how to make a unique colorful chair for your deck

    - 0 comments
    Diy adirondack chair: how to make a unique colorful chair for your deck 1
    Diy adirondack chair: how to make a unique colorful chair for your deck 2


    Adirondack chairs are synonymous with relaxing summer days, but why settle for the standard brown? Inject your personality into your deck with a unique, colorful DIY Adirondack chair project. This guide will walk you through the process, from material selection to paint application, ensuring a vibrant masterpiece that complements your outdoor space.

    Choosing Your Materials & Colors:

    Wood: Cedar, redwood, and pressure-treated pine are excellent choices for their durability and natural resistance to weather. Opt for 2x4 and 2x6 lumber for the chair's construction.
    Hardware: Galvanized screws are a must for outdoor use, ensuring lasting strength.
    Paint: Choose a high-quality exterior paint in a vibrant shade that speaks to your style. Consider a solid color, or get creative with stripes, geometric patterns, or a gradient for a unique look.
    Optional: Staining: Use a wood stain to enhance the natural grain of your wood before painting for an extra layer of protection.

    Crafting Your Unique Design:

    1. Select a Pattern: There are countless Adirondack chair plans available online, find one that matches your skill level and desired aesthetic.
    2. Prepare the Wood: Cut the wood to the required dimensions, sanding each piece for a smooth finish.
    3. Assembly: Follow your chosen plan meticulously, using wood glue and galvanized screws for strong joints.
    4. Sanding & Preparation: Once assembled, sand the chair thoroughly for a uniform surface, then apply a wood filler to any gaps or imperfections.
    5. Painting Time: Clean the chair thoroughly before applying your chosen paint. Use a high-quality brush or roller for a professional finish. Apply multiple coats for maximum coverage and durability.

    Tips for a Vibrant Finish:

    Color Inspiration: Take cues from your existing deck furniture or floral arrangements for a cohesive look.
    Practice Makes Perfect: Practice your painting technique on a scrap piece of wood to ensure even color application and prevent drips.
    Protect Your Work: Apply a sealant after the paint has dried to protect it from the elements and extend its lifespan.

    Beyond the Basics:

    Upcycled Materials: Repurpose old pallets, salvaged wood, or even plastic bottles for an eco-friendly twist.
    Unique Finishes: Try a distressed look, stencils, or decoupage for a personalized touch.
    Comfortable Cushions: Add colorful cushions to your creation for an extra layer of comfort and personality.

    With a little creativity and effort, you can transform your deck with a vibrant, personalized Adirondack chair that's as unique as you are. Enjoy your DIY masterpiece and endless hours of relaxation in your colorful oasis.

    [Continue reading...]

    How to build a lightweight adirondack chair for easy moving

    - 0 comments


    Adirondack chairs are a beloved staple of outdoor living, but their weight can sometimes be a deterrent. If you want the comfort of an Adirondack chair without the struggle of moving it, consider building a lightweight version. This guide will provide you with actionable tips to achieve your goal.

    Material Choices:

    Wood: Opt for lighter woods like cedar, redwood, or pine instead of heavier hardwoods like oak or maple. These woods offer a good balance of strength and lightness.
    Aluminum: For a truly lightweight option, consider using aluminum. It’s durable, corrosion-resistant, and easy to work with.
    Composite Materials: Recycled plastic lumber provides a maintenance-free alternative that is also very lightweight.

    Design Modifications:

    Reduce Thickness: Thinner slats and frame pieces will significantly reduce the chair's overall weight. However, ensure the structural integrity of the chair is not compromised.
    Open Back: A classic Adirondack chair design features a solid back. Consider opting for a design with an open back, which will decrease the overall weight.
    Lightweight Hardware: Choose lightweight hardware like aluminum screws and brackets.

    Construction Tips:

    Pocket-Hole Joinery: Pocket-hole joinery is a strong and lightweight method for assembling the chair. It's a beginner-friendly technique that requires minimal tools.
    Lightweight Fasteners: Use lightweight screws and fasteners to further reduce weight.
    Minimal Finish: A clear sealant or stain will protect the wood without adding significant weight. Avoid heavy paints or varnishes.

    Additional Considerations:

    Chair Legs: Consider using wider, angled legs for added stability, as this will reduce the need for heavy bracing.
    Chair Size: A smaller chair will automatically be lighter than a larger one. Consider the intended use of the chair and adjust its size accordingly.

    By making smart material choices and design modifications, you can build a lightweight Adirondack chair that is easy to move and enjoy. Remember to prioritize structural integrity while minimizing the weight. With a little planning and effort, you can create a beautiful and functional chair that you'll love for years to come.

    [Continue reading...]
     
    Copyright © 2012. Line New - Posts · Comments
    Powered by Blogger