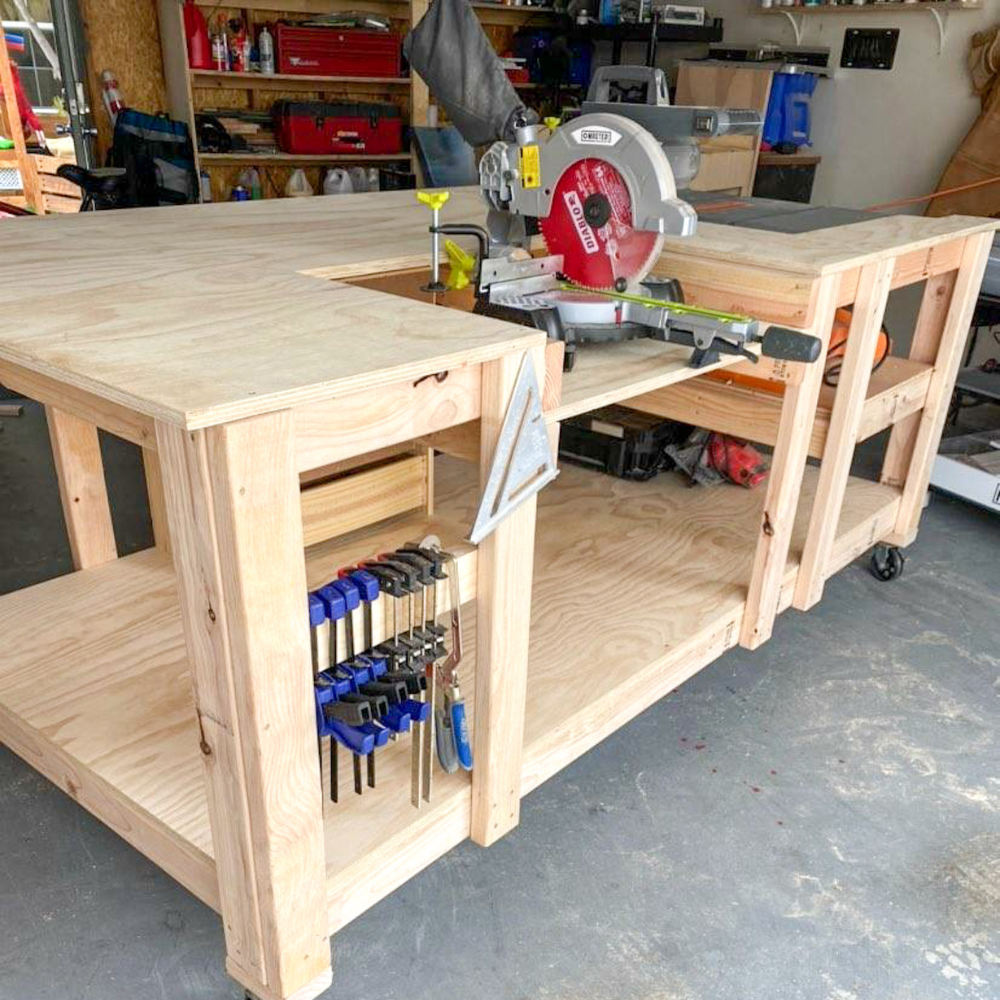
Alright, you're ready to level up your workshop game with a workbench that's built for serious woodworking! Let's break down how to build a DIY workbench that's perfectly tailored to your needs, featuring a built-in table saw and miter saw station. This ain't your grandpa's workbench, this is a beast!

Why Build a Custom Workbench?
Ultimate Flexibility: No more lugging tools around! You'll have your table saw, miter saw, and all your essentials in one spot, ready to rock.
Space Efficiency: Say goodbye to clutter! This workbench will maximize your workspace and keep everything organized.
DIY Satisfaction: Building your own workbench is a rewarding experience! You get to personalize it and make it your own.
Durability: Built with quality materials, this workbench will withstand years of heavy use.
Building Your Dream Workbench: A Step-by-Step Guide
1. Planning & Design:
Measure Your Space: Determine the ideal size for your workbench to fit comfortably in your workshop.
Decide on Features: Do you want drawers, shelves, a pegboard, or other storage options? Plan these out now.
Choose Materials: Solid wood, plywood, or MDF are popular options. Think about the weight you'll be putting on it.
Design Your Layout: Sketch out the overall design. Where will the table saw and miter saw sit? What will the work surface look like?
2. Materials:
Framing: 2x4s or 4x4s for the frame (depending on the size and weight)
Work Surface: Plywood or MDF (at least 3/4" thick)
Table Saw and Miter Saw: Choose models that fit your needs and budget.
Fasteners: Screws, nails, glue, etc.
Support Brackets and Hardware: For mounting your saws and creating storage.
3. Construction:
Build the Base: Assemble the frame using the 2x4s or 4x4s, ensuring it's sturdy and level. Use corner braces and joists for extra support.
Work Surface: Cut the plywood or MDF to size and attach it to the frame with screws or glue.
Miter Saw Station: Build a platform using 2x4s to mount the miter saw securely to the workbench.
Table Saw Housing: Create a secure housing for the table saw using 2x4s, plywood, and hardware. Consider making it removable for portability.
Dust Collection: Set up dust collection for both saws. You can use a dedicated dust collector or connect to your shop vac.
Storage: Add drawers, shelves, or pegboard to keep your tools organized and within easy reach.
4. Finishing Touches:
Sanding: Sand the entire workbench to ensure a smooth finish.
Finishing: Apply a stain, paint, or finish to protect the wood and give it a polished look.
Dust Control: Line the drawers and storage areas with dust-catching liners.
Lighting: Add good lighting to your workspace to make it easier to see and work.
Here's how to make your workbench even more awesome:
Mobile Base: Add wheels to your workbench for easy movement around the workshop.
Outfeed Table: Build a separate table to extend the working area of your table saw and miter saw.
Power Supply: Install electrical outlets to power your tools and equipment.
Safety Features: Add a safety bar to prevent tools from falling off the workbench.
Customizable Storage: Use pegboard, hooks, and shelves to organize your tools and supplies.
Building a DIY workbench is about more than just getting the job done. It's about creating a space where you can unleash your creativity and build amazing projects!
0 comments:
Post a Comment