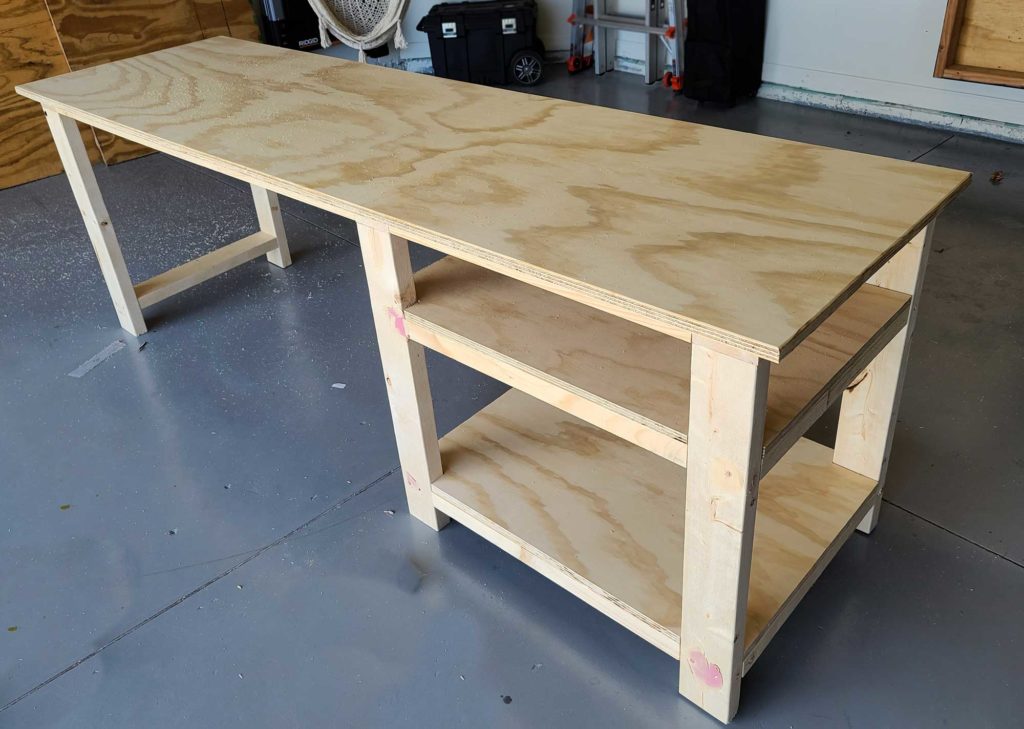
Building a Compact Wood Desk with Built-in Shelves: A DIY Guide
Hey there, DIY enthusiasts! Are you tired of cramped spaces and overflowing clutter? Building a compact wood desk with built-in shelves can be a fantastic solution. Not only does it provide a dedicated workspace, but it also helps organize your belongings and keeps your space looking neat and tidy. Let's embark on this exciting woodworking adventure together!
Planning Your Desk Design
Before diving into the tools and materials, let's brainstorm your perfect desk design. This is your chance to personalize your workspace to fit your needs and style. Here are some key considerations:
1. Dimensions and Functionality:
What size will work best for your space? Consider how much workspace you need, and if you'd like to add a drawer or two. Remember, you want it to be compact but functional. Do you need a lot of shelf space for books or electronics? This will determine the depth and height of your shelves. Take measurements and sketch out a rough design on paper.
2. Wood Choice:
There's a world of wood to choose from, each with its own characteristics and price point. Here are a few popular choices:
- Pine: Affordable and lightweight, but may be softer and prone to scratches.
- Oak: Durable, strong, and aesthetically pleasing, but more expensive.
- Maple: Hard, dense, and smooth, with a beautiful grain. It's a great choice for a desk surface.
- Birch: Affordable and a good alternative to maple, with a slightly less pronounced grain.
- Plywood: A versatile and budget-friendly option, offering strength and stability.
Consider the weight and thickness of your chosen wood when determining the design and stability of your desk.
3. Style and Finishing:
Do you want a rustic, modern, or minimalist look? The wood type and stain or paint you choose will define the style. If you're going for a natural look, consider a clear sealant. A darker stain can create a more dramatic feel, while white or gray paint will provide a modern edge.
Gathering Tools and Materials
Now that you've got your design in mind, it's time to gather your tools and materials. Here's a typical list, but adjust it based on your specific design:
- Wood: (Depending on your design, you may need: desk top boards, shelf boards, leg boards, support boards, back panel boards)
- Wood glue
- Wood screws
- Wood filler
- Sandpaper (various grits)
- Stain or paint
- Clear sealant
- Tape measure
- Pencil
- Circular saw or miter saw
- Drill
- Clamps
- Level
- Safety goggles
- Dust mask
Before you start cutting, make sure your tools are sharp and in good working order. Safety first!
Step-by-Step Construction
Now for the exciting part â€" building your desk! Here's a general guide, but feel free to adapt it to your specific design.
1. Cutting the Wood:
Use your measurements and saw to cut all the wood pieces to the desired sizes. Remember to add a little extra for adjustments and sanding. Mark the cuts with a pencil to ensure accuracy.
2. Assembling the Shelves:
If your design includes shelves, start by assembling them. Cut the shelf supports to the correct length and attach them to the back panel using wood glue and screws. Add the shelf boards to the supports, ensuring they are level and flush.
3. Building the Desk Legs and Support Structure:
Attach the desk legs to the bottom of the desk top using wood glue and screws. You can also use corner braces for extra stability. For a more traditional look, consider adding a drawer or shelf underneath the desk top.
4. Attaching the Shelves to the Desk:
Once the legs and supports are in place, attach the shelf unit to the back of the desk. Use wood glue and screws, and ensure it's level and securely fastened.
5. Finishing Touches:
Fill any gaps or holes with wood filler and allow it to dry completely. Sand the entire desk surface, starting with rougher grit sandpaper and moving to finer grits for a smooth finish. Apply your chosen stain or paint in thin coats, allowing each coat to dry fully before applying the next. Finally, seal the surface with a clear coat for protection and enhanced durability.
Tips and Tricks
Here are a few tips and tricks to make your desk building journey even smoother:
- Practice makes perfect: If you're new to woodworking, start with some practice cuts on scrap wood before cutting your final pieces.
- Measure twice, cut once: Accuracy is key! Double-check your measurements before making any cuts. A tape measure and a sharp pencil are your best friends.
- Use clamps: Clamp your pieces together while the wood glue dries to ensure a strong and stable bond.
- Pre-drill holes: This will prevent the wood from splitting when you're driving in screws.
- Sand carefully: A smooth and consistent sanding job will result in a beautiful finish. Pay attention to corners and edges.
- Don't rush the process: Take your time and enjoy the process. A well-made desk will be a source of pride and satisfaction for years to come.
Let's Get Creative!
Remember, this is just a basic guide. Don't be afraid to experiment and personalize your design! Add your own touches with different wood types, hardware, or even a custom-designed drawer. The sky's the limit! With a little creativity and effort, you'll have a compact and functional wood desk that's perfectly tailored to your needs.
Happy building!
0 comments:
Post a Comment