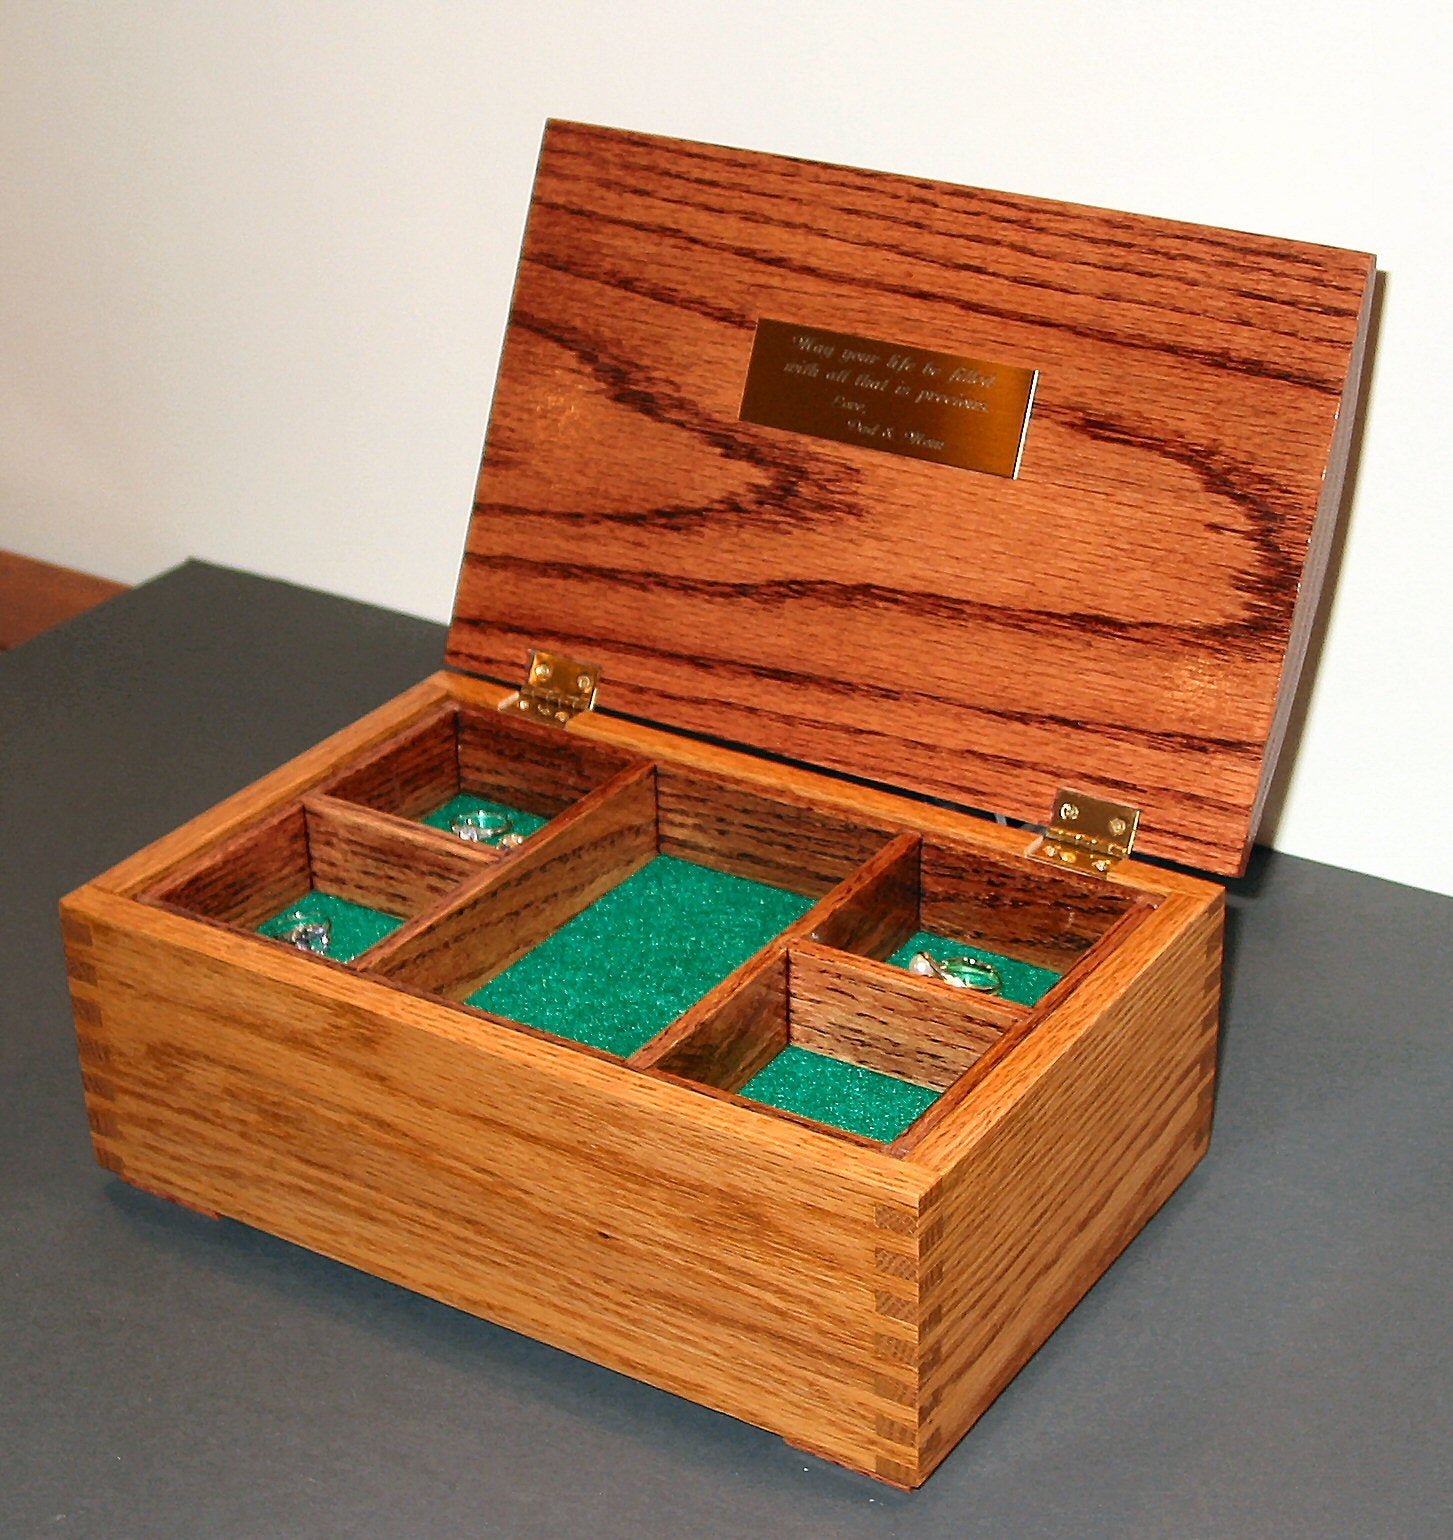
Okay, so you’ve got all these beautiful pieces of jewelry, and they’re just sitting around, getting tangled up in a drawer, or maybe even worse, just thrown in a pile. It’s time to give them the respect they deserve! We’re talking about a handmade wooden jewelry box.
It’s a project that’s totally doable, even if you’re not the most experienced woodworker. And it’s way more rewarding than buying one from the store. You get to choose the wood, the design, the size, and personalize it with your own touch. Plus, it’s a great way to practice your woodworking skills and create something truly unique.
Let's dive in, shall we?
Step 1: Gather Your Supplies
First things first, let’s get our supplies together. You’ll need:
Wood: Choose something nice and sturdy, like maple, cherry, walnut, or even pine. Just avoid anything too soft, as you’ll be drilling and cutting into it.
Tools: A jigsaw, a drill, a hammer, sandpaper, wood glue, a tape measure, a pencil, and clamps.
Hardware: Hinges (two sets, one for each side), a lock and key, a latch, and some screws.
Finishing Supplies: Wood stain, wood sealer, and a brush.
Step 2: Designing Your Jewelry Box
Okay, now comes the fun part â€" designing your jewelry box! Think about what you want it to look like.
Shape: Traditional rectangle? Fancy octagon? Maybe even a heart-shaped box for all your romantic jewelry!
Size: How much jewelry do you need to store? Make it big enough for everything, but not so big that it takes up too much space.
Details: Do you want compartments, drawers, or maybe a little mirror inside?
I like to sketch out a few different ideas on paper first, just to get a feel for what I want to do.
Step 3: Cutting and Shaping
Time to break out the power tools!
Cut the wood: Use your jigsaw to cut the pieces of wood to the sizes you’ve determined from your design. Be sure to make your measurements twice and cut once! No one likes a box with lopsided sides.
Shape the wood: If you want fancy curves or rounded corners, this is where you’ll use your sandpaper and your patience to smooth out those edges.
Step 4: Assembling Your Box
Now it’s time to build your masterpiece.
Glue and Clamp: Apply wood glue to the edges of your box pieces, then use clamps to hold them together firmly while the glue dries. You’ll want to make sure the corners are nice and tight.
Drilling for Hinges: Once the box is assembled, carefully drill pilot holes for your hinges on both sides. This will prevent the wood from splitting when you screw them in.
Attaching the Hinges: Attach your hinges using the screws provided. Make sure they’re aligned perfectly so the lid opens and closes smoothly.
Installing the Lock and Latch: Drill pilot holes for the lock and latch, then attach them securely.
Step 5: Adding a Little Finishing Touches
We’re almost done! Now it’s time to give your jewelry box some personality.
Sanding: Sand the entire surface of the box smooth, starting with a coarser grit and finishing with a finer grit for a smooth, professional look.
Staining: If you’re using wood stain, apply it evenly with a brush and let it dry thoroughly. If you’re going for a natural look, you can skip this step.
Sealing: Protect your box from scratches and spills with a layer of wood sealer. This will also help to enhance the beauty of your chosen wood.
Step 6: Adding Interior Details
This is your chance to get creative and customize your box to your heart’s content.
Compartments: Create compartments inside the box using thin pieces of wood or even cardboard. You can even add dividers to make it easier to organize your jewelry.
Drawers: Build small drawers to house your larger jewelry items.
Mirror: Add a small mirror inside the lid for easier viewing.
Step 7: The Big Reveal!
And there you have it! Your very own, handmade wooden jewelry box. It’s ready to hold your most prized possessions, adding a touch of elegance and craftsmanship to your space.
Here are some tips to make your jewelry box truly unique:
Inlay: Create beautiful patterns by using different types of wood or other materials like mother of pearl, shell, or even metal.
Carving: Add some decorative carvings to the box, such as a vine pattern, a floral motif, or even your initials.
Painting: If you’re not a fan of staining, paint your box in your favorite color, or use a decoupage technique to create a unique design.
Beyond the Basics: Going the Extra Mile
Feeling adventurous? Here are some ideas to elevate your jewelry box game:
Secret Compartment: Add a hidden compartment within the box to stash your most valuable items.
Light Up: Install a small LED light inside the box for a dramatic effect.
Rotary Mechanism: Create a hidden compartment with a rotating mechanism, adding a fun element of surprise.
And now, the most important step...
Enjoy your creation!
Making a wooden jewelry box is a project that you can personalize to reflect your own style and preferences. It’s not just about the box itself, it’s about the process of creating something beautiful and unique with your own two hands.
So go ahead, gather your supplies, and start building! You’ll be surprised at what you can achieve.
0 comments:
Post a Comment