Wednesday, November 20, 2024

Outdoor Benches with Simple, Elegant Styling That Will Appeal to Minimalists

- 0 comments
Outdoor Benches with Simple, Elegant Styling That Will Appeal to Minimalists

Outdoor Benches That Whisper "Minimalism"

You're a minimalist at heart. You love clean lines, simple forms, and spaces that feel serene and uncluttered. Your home reflects this aesthetic, so why not extend that same feeling to your outdoor space? Outdoor benches are a fantastic way to add seating and enhance the ambiance of your patio, deck, or garden, but not all benches scream "minimalist."

Today, we're diving into the world of outdoor benches that are specifically designed to appeal to your minimalist sensibilities. We'll explore benches that are:

  • Simple and sleek, with no unnecessary embellishments.
  • Made from natural materials like wood, metal, or stone, evoking a sense of connection to nature.
  • Functionally designed for comfort and durability, with no frills.

Ready to find the perfect minimalist bench for your outdoor oasis? Let's get started!

Why Choose Minimalist Outdoor Benches?

Minimalism isn't just a design style; it's a philosophy. It's about focusing on what truly matters and letting go of excess. In the context of outdoor benches, this translates to:

  • Visual Calm: Minimalist benches are designed to blend seamlessly with their surroundings, creating a sense of peace and tranquility. Their simple forms and clean lines don't compete for attention, allowing your garden's natural beauty to shine.
  • Enhanced Functionality: Minimalist benches prioritize practicality. You won't find any unnecessary ornamentation or overly intricate designs that hinder their comfort or durability. They're built to stand the test of time, both in terms of their visual appeal and their functionality.
  • Versatility: Minimalist benches are incredibly versatile. They can be incorporated into a variety of outdoor settings, from a modern patio to a rustic garden. Their clean design allows them to adapt to different styles and color palettes.

Materials That Sing Minimalism

Choosing the right materials for your minimalist bench is crucial. Here are some favorites that embody simplicity and elegance:

Wood: Warmth and Natural Beauty

Wood is a timeless material that exudes warmth and natural beauty. It can be left in its natural state to showcase its unique grain patterns, or stained or painted to complement your outdoor space. Choose hardwoods like teak, cedar, or ipe for exceptional durability and weather resistance. They'll age gracefully and develop a patina over time that adds to their character.

Metal: Modern Edge and Durability

Metal offers a sleek and modern aesthetic. Aluminum is lightweight, rust-resistant, and requires minimal maintenance. Steel can be powder-coated to achieve a variety of finishes, adding a touch of industrial chic. Metal benches often have a minimalist design, with clean lines and simple shapes.

Stone: Timeless Elegance and Solidity

Stone is a material that exudes elegance and solidity. It's perfect for creating a timeless, architectural feel in your outdoor space. Granite, slate, and limestone are popular choices for outdoor benches. They're durable, weather-resistant, and require minimal maintenance. However, stone benches can be quite heavy, so consider where you'll be placing them.

Popular Styles of Minimalist Outdoor Benches

There are several minimalist bench designs that are perfect for creating a serene and uncluttered outdoor space.

Straight Bench: Classic Simplicity

The straight bench is a classic minimalist design that offers simple, functional seating. It typically features a straight, rectangular frame with a flat seat and backrest. This design is incredibly versatile and can be easily incorporated into any outdoor setting.

Curved Bench: Gentle Flow and Elegance

A curved bench adds a touch of gentle flow and elegance to your outdoor space. The curved shape provides a more organic and inviting aesthetic. It's a perfect choice for creating a cozy nook in your garden or adding a touch of whimsy to your patio.

Modular Benches: Flexibility and Customization

Modular benches offer ultimate flexibility and customization. They consist of individual sections that can be arranged in different configurations to create a bench that fits your specific needs and space. You can add or remove sections as your needs evolve, making them ideal for growing families or changing layouts.

Tips for Incorporating Minimalist Benches into Your Outdoor Space

Here are some tips for incorporating minimalist benches into your outdoor space and creating a cohesive, minimalist vibe:

  • Consider the Surrounding Landscape: The bench should complement the existing landscape, whether it's a lush garden, a minimalist patio, or a modern deck.
  • Choose a Neutral Color Palette: Stick to neutral colors like white, gray, black, or natural wood tones. This will create a sense of calm and allow the bench to blend seamlessly with its surroundings.
  • Add Minimalist Accessories: A few simple accessories can enhance the minimalist aesthetic of your outdoor space. Think natural fiber cushions, a simple planter with a single, striking plant, or a small sculpture.
  • Keep it Clean and Uncluttered: Minimalism is all about decluttering and creating a sense of space. Avoid overcrowding the area around your bench. Keep the surrounding area tidy and free of clutter.

Frequently Asked Questions

Where can I find minimalist outdoor benches?

You can find minimalist outdoor benches at a variety of retailers, including online marketplaces like Amazon and Etsy, as well as home improvement stores and specialty furniture stores. Look for brands known for minimalist design or focus on outdoor furniture.

How do I care for my minimalist outdoor bench?

The best way to care for your minimalist outdoor bench is to follow the manufacturer's instructions. In general, wood benches may require occasional cleaning and sealing to protect them from the elements. Metal benches may need to be wiped down with a damp cloth, and stone benches may require minimal cleaning with soapy water.

What's the difference between minimalist and modern outdoor benches?

Minimalist outdoor benches are characterized by their simplicity, functionality, and clean lines. They often feature natural materials and a focus on form and function. Modern outdoor benches share some similarities, but they often have a more geometric and angular design, sometimes incorporating bold colors or unconventional materials.

With a minimalist outdoor bench, you're not just adding seating, you're adding a sense of tranquility, purpose, and timeless elegance to your outdoor space. It's a statement piece that reflects your values and creates an environment for relaxation and contemplation.

[Continue reading...]

Tuesday, November 19, 2024

Step-by-Step Floating Shelf Woodworking Projects for Beginners

- 0 comments
Step-by-Step Floating Shelf Woodworking Projects for Beginners

Floating Shelf Woodworking Projects for Beginners

Floating shelves offer a stylish and space-saving solution for displaying cherished items, books, or decorative accents. Their seemingly suspended appearance adds a touch of modern elegance to any room. If you're a woodworking novice, embarking on a floating shelf project is a rewarding and achievable undertaking. This guide provides step-by-step instructions and helpful tips to guide you through the process, enabling you to craft stunning floating shelves that enhance your home decor.

Project Planning and Preparation

Before you dive into the actual construction, meticulous planning is essential to ensure a successful project.

1. Determine Shelf Dimensions and Placement

  • Measure the space where you intend to install the shelf. Consider the available width, height, and depth.
  • Decide on the desired shelf length and depth. A good starting point for beginners is a shelf with a length of 12 inches to 24 inches and a depth of 6 inches to 8 inches.
  • Sketch out the design, including the number of shelves and their arrangement.
  • Mark the wall where the brackets will be mounted. Ensure the brackets are placed at a suitable height and are level.
  • 2. Select Wood and Hardware

  • Choose a wood type that aligns with your design preferences and budget. Popular options for floating shelves include pine, oak, maple, and walnut. Consider the weight the shelves will support when selecting wood thickness.
  • Select sturdy brackets to support the shelf. Metal brackets are a common choice due to their durability and sleek appearance.
  • Purchase screws and anchors appropriate for the wall material. For drywall, use drywall anchors to ensure secure mounting.
  • Gather additional tools and materials such as a tape measure, pencil, saw, drill, sandpaper, wood stain or paint, and finishing oil or sealant.
  • Building the Shelves

    Once you have gathered your materials, follow these steps to construct your floating shelves:

    1. Cut the Shelf Boards

  • Using a table saw, chop saw, or hand saw, cut the boards to your desired length. Ensure the cuts are clean and precise.
  • Use a sanding block or sandpaper to smooth any rough edges.
  • 2. Sand the Shelves

  • Sand the shelf surfaces to remove any imperfections and create a smooth finish.
  • Start with coarse-grit sandpaper (80-grit) and gradually progress to finer grits (120-grit, 220-grit) for a progressively smoother surface.
  • 3. Apply Stain or Paint

  • If desired, apply a wood stain or paint to enhance the appearance of your shelves.
  • Follow the manufacturer's instructions for application and drying time.
  • Allow the stain or paint to dry completely before proceeding to the next step.
  • 4. Apply Finishing Oil or Sealant (Optional)

  • To protect the wood and enhance its durability, apply a finishing oil or sealant.
  • Choose a sealant that complements the wood type and your desired level of protection.
  • Apply the finish according to the manufacturer's instructions.
  • Allow the finish to dry completely before installing the shelves.
  • Installing the Shelves

    The final stage involves mounting the shelves onto the wall:

    1. Install the Brackets

  • Position the brackets on the wall at the marked locations.
  • Use a level to ensure the brackets are installed horizontally.
  • Drill pilot holes for the screws, if necessary.
  • Securely fasten the brackets to the wall using the appropriate screws and anchors.
  • 2. Attach the Shelves

  • Carefully slide the shelves onto the brackets.
  • Ensure the shelves are level and securely in place.
  • If desired, you can apply a decorative trim to the edge of the shelf.
  • Finishing Touches

    To complete your floating shelves, add some final touches:

    1. Clean the Shelves

  • Wipe down the shelves with a damp cloth to remove any dust or debris.
  • Allow the shelves to dry completely before arranging your items.
  • 2. Arrange Your Items

  • Display your treasured books, decorative accents, or other items on the shelves.
  • Create a visually appealing and balanced arrangement.
  • Tips for Success

    Here are a few extra tips to ensure a successful floating shelf project:

    1. Practice on Scrap Wood

  • Before working on your actual project, practice your cuts and techniques on scrap wood. This will help you refine your skills and avoid mistakes.
  • 2. Use a Level

  • A level is essential for ensuring that your shelves are installed horizontally.
  • 3. Choose the Right Screws

  • Select screws that are long enough to penetrate the wall and provide secure fastening.
  • 4. Pre-Drill Holes

  • Pre-drilling pilot holes for screws will help prevent wood splitting and make installation easier.
  • 5. Test the Weight Capacity

  • Before placing heavy items on your shelves, test the weight capacity by adding a few items and checking for any signs of stress.
  • Conclusion

    Building floating shelves is an enjoyable and rewarding woodworking project that even beginners can tackle. By following these step-by-step instructions and utilizing the provided tips, you can craft beautiful and functional floating shelves to enhance the decor of your home. Remember to plan carefully, take your time, and most importantly, have fun with the process.

    [Continue reading...]

    Monday, November 18, 2024

    How to Craft Wooden Pencil Holders for Teachers and Students

    - 0 comments
    How to Craft Wooden Pencil Holders for Teachers and Students

    Crafting Wooden Pencil Holders for Teachers and Students: A Guide to Personalized Desk Organization

    In the realm of education, organization plays a pivotal role in fostering a conducive learning environment. For teachers and students alike, maintaining a tidy and efficient workspace is paramount. One simple yet effective solution lies in crafting personalized wooden pencil holders. These handcrafted pieces not only serve as practical storage solutions but also add a touch of warmth and creativity to any desk. This comprehensive guide will equip you with the necessary knowledge and techniques to create unique and functional wooden pencil holders, making them a perfect gift for educators or a thoughtful addition to your own study area.

    Choosing the Right Wood

    The foundation of any woodworking project lies in selecting the appropriate wood. When crafting pencil holders, consider factors such as durability, aesthetics, and availability. Here are some popular wood choices for this project:

    Hardwoods

    • Maple: Known for its beautiful grain patterns and durability, maple is an excellent choice for pencil holders. It is relatively hard and resistant to scratches and dents.
    • Cherry: With its rich reddish-brown hue and attractive grain, cherry wood adds a touch of elegance to any project. It is also relatively hard and durable.
    • Walnut: Possessing a dark, rich brown color and distinctive grain patterns, walnut wood exudes a sophisticated charm. It is a strong and durable wood that can withstand daily use.

    Softwoods

    • Pine: This softwood is readily available and affordable, making it a popular choice for beginners. Its light color and knotty grain create a rustic aesthetic.
    • Cedar: Cedar wood offers a unique aromatic quality and natural resistance to insects and moisture. It is a good choice for pencil holders that will be stored in humid environments.

    Gathering the Necessary Tools and Materials

    Before embarking on the crafting process, ensure you have the following tools and materials readily available:

    • Wood: Choose your preferred wood type and purchase a piece with dimensions that will accommodate your desired pencil holder size.
    • Measuring tape: Essential for accurately measuring and marking the wood.
    • Pencil: For transferring measurements and drawing outlines onto the wood.
    • Hand saw or jigsaw: To cut the wood to the desired size and shape.
    • Sandpaper: Different grits of sandpaper are used to smooth out the edges and surfaces of the wood.
    • Wood glue: To securely bond the different pieces of the pencil holder.
    • Clamps: To hold the pieces together while the glue dries.
    • Finish: Choose a suitable finish for the pencil holder, such as oil, varnish, or paint.
    • Paintbrushes: For applying the finish to the wood.
    • Optional: Wood carving tools: For adding intricate designs or personal touches.

    Step-by-Step Guide to Crafting a Wooden Pencil Holder

    Now that you have the necessary tools and materials, let's dive into the step-by-step guide to crafting a wooden pencil holder:

    Step 1: Designing the Pencil Holder

    • Decide on the shape and size of your pencil holder. You can opt for a simple cylindrical or rectangular design or get creative with more intricate shapes. Consider the number of pencils you want to hold and the overall aesthetic you wish to achieve.
    • Sketch your design on paper, including measurements. This will serve as a blueprint for the actual construction.

    Step 2: Cutting the Wood

    • Measure the wood according to your design and mark the cutting lines with a pencil.
    • Carefully cut the wood using a hand saw or jigsaw. Ensure your cuts are precise and straight.

    Step 3: Shaping the Wood

    • Sand the edges and surfaces of the wood with sandpaper, starting with coarser grits and gradually moving to finer ones.
    • If you desire a curved or rounded shape, use wood carving tools to gently shape the wood according to your design.

    Step 4: Assembling the Pencil Holder

    • If your design involves multiple pieces, apply wood glue to the joining edges and clamp them together securely.
    • Allow the glue to dry completely before proceeding.

    Step 5: Finishing the Pencil Holder

    • Sand the entire pencil holder again to ensure a smooth finish.
    • Apply your chosen finish to the wood using a paintbrush. Allow each coat to dry completely before applying the next.
    • Consider adding a personal touch by engraving the holder with a name, initials, or a special message.

    Tips for Creating Personalized Pencil Holders

    To add a unique flair to your wooden pencil holders, consider the following personalization tips:

    • Incorporate decorative elements: Use wood carving techniques to add patterns, designs, or even a small animal figurine to the pencil holder.
    • Paint or stain the wood: Experiment with different colors and stains to create vibrant or subtle finishes. You can even create a distressed look by applying paint and sanding it down.
    • Embellish with embellishments: Add decorative accents like beads, buttons, or decorative paper to enhance the visual appeal.
    • Create themed pencil holders: Design pencil holders inspired by specific themes, such as holidays, hobbies, or favorite characters.

    Conclusion

    Crafting wooden pencil holders is not only a practical endeavor but also a rewarding creative pursuit. By following this guide and incorporating your own personal touches, you can create personalized and functional desk organizers that will be cherished by teachers, students, and anyone who appreciates handcrafted beauty. Whether you're seeking a thoughtful gift or simply adding a touch of charm to your workspace, these wooden pencil holders are a testament to the power of creativity and the joy of bringing simple ideas to life.

    [Continue reading...]

    Wednesday, November 13, 2024

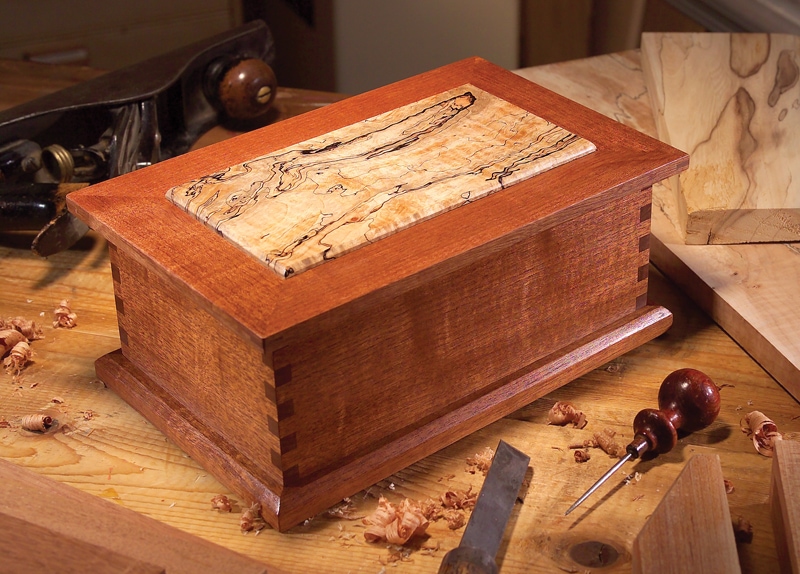
    Step-by-Step Guide to Making Wooden Jewelry Boxes for Sale

    - 0 comments
    Step-by-Step Guide to Making Wooden Jewelry Boxes for Sale

    A Comprehensive Guide to Crafting Wooden Jewelry Boxes for Sale

    The allure of handmade goods, particularly those crafted from natural materials like wood, continues to captivate discerning customers. Jewelry boxes, with their blend of functionality and aesthetic appeal, are a popular choice for artisans seeking a rewarding and profitable craft. This guide provides a step-by-step approach to crafting exquisite wooden jewelry boxes that are not only beautiful but also have the potential to become sought-after items in the marketplace.

    1. Conceptualizing Your Design

    The foundation of any successful woodworking project lies in a well-defined design. Before embarking on the construction process, dedicate time to meticulously planning the aspects that will define your jewelry box.

    1.1. Determining the Box's Purpose and Target Audience

    The purpose of your jewelry box will heavily influence its design. Consider:

    • Jewelry Type: Are you creating a box for delicate necklaces and earrings, or for larger, more statement pieces? The size and compartments will vary accordingly.
    • Target Audience: Who are you designing the box for? A young girl may prefer a whimsical design, while an older woman might appreciate a more classic and elegant style.

    1.2. Choosing the Right Wood

    Wood selection plays a crucial role in both the visual appeal and durability of your jewelry box. Here are some popular choices:

    • Cherry: Known for its rich reddish-brown hue and beautiful grain patterns.
    • Walnut: Offers a distinctive dark brown color and a luxurious feel.
    • Maple: Provides a clean, light-colored surface that accentuates intricate details.
    • Pine: Affordable and readily available, pine is an excellent choice for beginners.

    1.3. Sketching and Modeling

    Before committing to construction, visualize your design through sketching or digital modeling. This process allows you to refine dimensions, explore different configurations, and experiment with aesthetic elements like inlays, carvings, or hardware.

    2. Gathering Tools and Materials

    Building a wooden jewelry box requires a specific set of tools and materials. Ensure you have the following:

    2.1. Woodworking Tools

    • Table Saw: Used for making precise cuts.
    • Band Saw: Ideal for curved cuts and intricate shapes.
    • Jointer: Smooths and straightens the edges of wood boards.
    • Planer: Reduces the thickness of wood boards.
    • Drill Press: Creates accurate holes for hinges, drawer slides, and other hardware.
    • Sanding Block and Sandpaper: Used to smooth wood surfaces and achieve a polished finish.
    • Hand Tools: Chisels, hammers, screwdrivers, and clamps are essential for assembly and finishing.

    2.2. Materials

    • Wood Boards: The chosen wood species in the desired dimensions.
    • Hinges: High-quality hinges that are appropriate for the size and style of your box.
    • Drawer Slides: If your design includes drawers, choose smooth-running slides.
    • Hardware: Handles, knobs, and other decorative elements.
    • Wood Glue: A strong, durable glue designed for woodworking.
    • Finishing Products: Wood stain, varnish, or paint to achieve your desired look.

    3. Construction and Assembly

    Once your design is finalized and your materials are gathered, you can move on to the construction phase.

    3.1. Cutting and Shaping

    • Precise Cutting: Use your table saw to make accurate cuts for the box's base, sides, lid, and any internal compartments.
    • Shaping: If your design calls for curved or intricate shapes, utilize your band saw.
    • Smoothing: After cutting, use the jointer and planer to ensure smooth, flat surfaces.

    3.2. Joining and Assembly

    • Joints: Choose appropriate joints based on your design, such as dovetail joints, mortise and tenon joints, or simple butt joints.
    • Glueing: Apply wood glue generously to the joining surfaces and clamp them securely until the glue dries completely.
    • Hinge Installation: Attach the hinges to the lid and box base, ensuring proper alignment. Use a drill press for precision.
    • Drawer Assembly: If your box includes drawers, assemble them using drawer slides, ensuring smooth operation.

    4. Finishing Touches

    The final touches bring your wooden jewelry box to life. This stage involves sanding, staining, varnishing, and adding hardware.

    4.1. Sanding

    • Progressive Sanding: Start with a coarse-grit sandpaper (80-120 grit) to remove any rough edges and imperfections. Gradually work your way up to finer grits (220-400 grit) for a smooth, polished finish.

    4.2. Staining and Varnishing

    • Staining: If you choose to stain your box, apply the stain evenly with a brush or rag. Follow the manufacturer's instructions for drying time.
    • Varnishing: Apply a clear varnish or polyurethane sealant to protect the wood and enhance its natural beauty. Multiple thin coats are recommended for durability.

    4.3. Hardware Installation

    • Handles and Knobs: Attach handles or knobs to the lid, drawers, or sides of the box. Ensure they are securely fastened and visually appealing.
    • Decorative Elements: Incorporate other decorative elements, such as metal inlays, engraved designs, or personalized touches.

    5. Marketing and Selling Your Jewelry Boxes

    With your wooden jewelry boxes crafted to perfection, it's time to bring them to market.

    5.1. Pricing Your Work

    • Cost Calculation: Calculate the cost of materials, labor, and any overhead expenses.
    • Profit Margin: Determine a reasonable profit margin that accounts for your time and effort.
    • Market Research: Research the prices of similar jewelry boxes to gauge the competitive market.

    5.2. Sales Channels

    • Online Marketplaces: Platforms like Etsy, Amazon Handmade, and Shopify offer a wide reach to potential customers.
    • Craft Fairs and Shows: Participate in local craft fairs and exhibitions to showcase your creations.
    • Social Media: Utilize Instagram, Facebook, and Pinterest to build a following and market your jewelry boxes.
    • Local Boutiques: Approach local boutiques and gift shops that may be interested in carrying your products.

    5.3. Building Your Brand

    • Unique Branding: Develop a distinct brand identity, including a logo, tagline, and consistent visual style.
    • High-Quality Photography: Capture professional and captivating photos of your jewelry boxes.
    • Customer Service: Provide excellent customer service to build loyalty and positive reviews.

    Conclusion

    Creating wooden jewelry boxes for sale is a rewarding endeavor that combines craftsmanship, creativity, and entrepreneurship. By following this comprehensive guide, you can craft beautiful and functional jewelry boxes that have the potential to become successful products in the marketplace. Remember, consistency, quality, and marketing are key to building a thriving woodworking business.

    [Continue reading...]

    Woodworking Projects You Can Finish in One Day

    - 0 comments
    Woodworking Projects You Can Finish in One Day

    Woodworking Projects You Can Finish in One Day

    Whether you're a seasoned woodworker or just starting out, the thrill of completing a project in a single day is incredibly rewarding. It allows you to experience the satisfaction of crafting something beautiful and functional without the commitment of a long-term endeavor. This article will explore a variety of woodworking projects that can be tackled in a day, each with its unique charm and skill-building potential.

    Beginner-Friendly Projects

    If you're new to woodworking, these projects are a great place to start. They require minimal tools and techniques, making them accessible even for complete beginners.

    Cutting Board

    A cutting board is a practical and essential kitchen tool that's easy to make. You can use a single piece of hardwood, like maple or walnut, or create a more intricate design with contrasting wood species. The process involves cutting the wood to size, sanding the edges, and applying a food-safe finish.

  • Materials: Hardwood board, wood glue, finishing oil or wax
  • Tools: Table saw or circular saw, hand plane, sanding block, drill press (optional)
  • Coasters

    Coasters are a simple and stylish way to protect your furniture from heat and spills. You can create them in various shapes and sizes, using scraps of wood or purchasing pre-cut pieces. The steps involve cutting the wood, sanding the edges, and applying a finish of your choice.

  • Materials: Scrap wood, wood glue, cork or felt pads, finishing oil or varnish
  • Tools: Jigsaw or scroll saw, sanding block, drill press (optional)
  • Wooden Box

    A wooden box is a versatile project that can be used for storage, gifts, or even as a decorative element. You can build a simple box with basic joinery techniques or explore more advanced designs with dovetails or mitered corners. The process involves cutting the wood to size, joining the pieces, and applying a finish.

  • Materials: Plywood or hardwood, wood glue, finishing oil or paint
  • Tools: Table saw or circular saw, hand plane, miter saw (optional), drill press (optional)
  • Intermediate-Level Projects

    These projects require a bit more experience and technical skill but are still achievable in a day with careful planning and execution.

    Small Table

    A small table can be a functional piece of furniture for a variety of spaces, from a living room to a balcony. You can choose from a variety of styles, from a simple farmhouse table to a more elaborate design with turned legs. The process involves cutting the wood, assembling the table top, and attaching the legs.

  • Materials: Hardwood lumber, wood glue, screws or dowels, finishing oil or varnish
  • Tools: Table saw or circular saw, miter saw, drill press, router (optional), sander
  • Birdhouse

    A birdhouse is a fun and rewarding project that can bring a touch of nature to your backyard. You can create a simple design or a more elaborate birdhouse with a roof and multiple compartments. The process involves cutting the wood to size, assembling the birdhouse, and adding a finishing touch with paint or stain.

  • Materials: Plywood or hardwood, wood glue, screws, paint or stain
  • Tools: Jigsaw or scroll saw, drill press, sander
  • Wall Shelf

    A wall shelf is a practical and stylish way to add storage and visual interest to a room. You can choose from a variety of shapes and sizes, and even incorporate decorative elements like brackets or shelves. The process involves cutting the wood, assembling the shelf, and mounting it to the wall.

  • Materials: Plywood or hardwood, wood glue, screws, finishing oil or varnish
  • Tools: Table saw or circular saw, drill press, sander
  • Advanced Woodworking Projects

    These projects require a higher level of skill and experience, but they can be completed in a day with careful planning and efficient execution.

    Stool

    A stool is a versatile piece of furniture that can be used for seating, as a side table, or even as a decorative element. You can choose from a variety of styles, from a simple three-legged stool to a more elaborate design with turned legs or a padded seat. The process involves cutting the wood, assembling the stool, and adding a finishing touch with paint or stain.

  • Materials: Hardwood lumber, wood glue, screws or dowels, finishing oil or varnish
  • Tools: Table saw or circular saw, miter saw, drill press, router (optional), sander
  • Small Desk

    A small desk is a great option for a home office, a study room, or even a bedroom. You can create a simple design with basic joinery techniques or explore more advanced designs with dovetails or mitered corners. The process involves cutting the wood, assembling the desk, and adding a finishing touch with paint or stain.

  • Materials: Hardwood lumber, wood glue, screws or dowels, finishing oil or varnish
  • Tools: Table saw or circular saw, miter saw, drill press, router (optional), sander
  • Wooden Sign

    A wooden sign is a great way to add a personal touch to your home or garden. You can create a simple design with a single piece of wood or a more elaborate sign with multiple layers and carved details. The process involves cutting the wood, assembling the sign, and adding a finishing touch with paint or stain.

  • Materials: Hardwood lumber, wood glue, screws, paint or stain
  • Tools: Table saw or circular saw, miter saw, drill press, sander, router (optional)
  • Tips for Completing Woodworking Projects in a Day

    To ensure you finish your project within a day, follow these helpful tips:

  • Plan Ahead: Before you start, carefully plan your project, including the materials you need, the tools you will use, and the steps involved. This will help you stay organized and avoid any surprises.
  • Prepare Your Work Area: Make sure your workspace is clean, well-lit, and organized. This will help you work more efficiently and safely.
  • Use Sharp Tools: Sharp tools are essential for accurate cuts and a smooth finish. Make sure your blades and bits are in good condition.
  • Take Breaks: It's important to take regular breaks throughout the day to avoid fatigue and mistakes. Don't be afraid to step away from your project for a few minutes to refresh your mind.
  • Be Patient: Woodworking takes time and practice, so don't get discouraged if things don't go perfectly the first time. With patience and perseverance, you'll eventually achieve your desired results.
  • Conclusion

    Woodworking projects can be incredibly rewarding, especially when you can complete them in a single day. Whether you're a beginner or an experienced woodworker, there are countless projects that you can tackle within a day, from simple cutting boards to more complex stools and desks. By following the tips above, you can ensure that your woodworking projects are efficient, enjoyable, and successful.

    [Continue reading...]

    Inspired Woodworking Ideas for Memorable Gifts

    - 0 comments
    Inspired Woodworking Ideas for Memorable Gifts

    Inspired Woodworking Ideas for Memorable Gifts

    Hey there, fellow woodworking enthusiasts! Are you looking for some unique and thoughtful gift ideas that will truly impress your loved ones? Look no further! Woodworking is a fantastic way to create personalized and meaningful presents that will be cherished for years to come.

    From practical items to decorative pieces, the possibilities are endless. Let's dive into some inspired woodworking ideas that will spark your creativity and make your gifts truly memorable.

    Sentimental and Personal Gifts

    Gifts that hold sentimental value are often the most treasured. Consider these ideas that tap into memories and emotions:

    Personalized Cutting Boards

    A custom cutting board is a practical and beautiful gift that can be engraved with a special message, date, or even a family crest. Imagine the joy on their face when they see their name or a cherished quote etched into the warm, natural wood. You could even add a personalized touch by using wood from a special tree, like a family heirloom or a tree planted for a special occasion.

    Photo Frames

    A handcrafted photo frame is a classic gift that brings back warm memories. Get creative with the design! Consider incorporating elements like a special wood species, intricate carvings, or even a small hidden compartment for a secret message.

    Memory Boxes

    These beautiful boxes can be used to store precious keepsakes, like old letters, photographs, or other mementos. Add a personal touch by engraving the recipient's initials, a special date, or a meaningful quote.

    Wooden Toys

    If you're looking for a unique and heartwarming gift for a child, handcrafted wooden toys are the perfect choice. From classic building blocks to intricate dollhouses, a wooden toy is a timeless gift that will be treasured for generations.

    Practical and Useful Gifts

    Sometimes the best gifts are the ones that make everyday life a little easier and more enjoyable. Here are some practical woodworking ideas that will be both useful and appreciated:

    Spice Racks

    A well-organized spice rack is a kitchen must-have. Get creative with the design by incorporating different wood species, using unique shapes, or adding a touch of rustic charm.

    Wine Racks

    For the wine lover in your life, a custom-made wine rack is a thoughtful and practical gift. Choose a design that complements their existing decor and personalize it with an engraved message or a unique finish.

    Desk Organizers

    Help someone get organized with a beautiful desk organizer. Make it functional by incorporating compartments for pens, pencils, and other office supplies. Consider using reclaimed wood for a unique and sustainable touch.

    Jewelry Boxes

    A handcrafted jewelry box is a perfect gift for anyone who loves to adorn themselves. Add a touch of luxury with velvet lining or a unique closure mechanism.

    Decorative and Stylish Gifts

    If you're looking for a gift that will add a touch of elegance and personality to their home, consider these decorative woodworking ideas:

    Wall Clocks

    A handcrafted wall clock is a statement piece that can transform any room. Experiment with different wood species, finishes, and designs to create a unique and eye-catching timepiece. You can even use reclaimed wood or wood with a distinctive grain pattern.

    Sculptures and Ornaments

    Let your artistic side shine through with a handcrafted wooden sculpture or ornament. Create a whimsical animal, a unique abstract piece, or a beautiful floral design.

    Serving Trays

    A beautiful serving tray is a versatile and stylish gift. Use different wood species for a unique look, or experiment with inlays or carvings to add a personal touch. Consider incorporating handles made from leather or metal for a more luxurious feel.

    Mirrors

    A handcrafted mirror is a decorative and functional piece that can brighten up any room. You can add a rustic touch with a natural wood frame, or opt for a more modern look with a sleek, minimalist design.

    Beyond the Basics: Adding a Special Touch

    Once you've chosen your gift idea, it's time to add a special touch that will make it truly unique. Consider these ideas:

  • Use unique wood species. Experiment with different types of wood, like walnut, cherry, maple, or oak, to create stunning visual effects. Reclaimed wood adds a unique history and character to your project.
  • Incorporate intricate carvings. Carvings can add a touch of elegance and detail to your projects. Consider adding personalized motifs, floral designs, or geometric patterns.
  • Add a personal touch with engravings. Engraving a name, date, or special message onto your project will create a lasting memory.
  • Experiment with different finishes. Apply oil finishes, stains, or paint to enhance the natural beauty of the wood or create a unique look.
  • Add hardware accents. Brass, copper, or iron hardware can add a touch of elegance and sophistication to your projects.
  • Making Your Gifts Memorable: Presentation Matters

    You've poured your heart and soul into crafting a beautiful gift. Make sure the presentation is just as special!

  • Choose a beautiful box or wrapping paper. Use natural materials like burlap or kraft paper for a rustic look, or opt for a more elegant presentation with satin ribbon and a custom gift tag.
  • Add a handwritten card. A heartfelt message written in your own hand will make the gift even more meaningful.
  • Include a small, personalized detail. Attach a sprig of rosemary for good luck or a small piece of dried lavender for a fragrant touch.
  • By combining your woodworking skills with a touch of creativity and personal flair, you can create gifts that will be treasured for years to come. Have fun exploring the possibilities and happy crafting!

    [Continue reading...]

    Tuesday, November 12, 2024

    DIY Coffee Table Guide with Free Plans PDF Download

    - 0 comments
    DIY Coffee Table Guide with Free Plans PDF Download

    Elevate Your Living Room with a DIY Coffee Table

    Hey there, design enthusiasts! Are you ready to transform your living room into a stylish haven? Look no further than a DIY coffee table. It's a project that's both rewarding and surprisingly simple, even if you're a newbie to woodworking. Not only will you save a ton of cash, but you'll have a unique piece of furniture that reflects your personal style.

    We'll walk you through the entire process, from picking the perfect design to finishing touches that'll make your friends say, "Wow, you made that?" So grab your tools, put on your favorite tunes, and let's get building!

    Choosing the Right Coffee Table Design

    The first step is finding a design that fits your space and aesthetic. Here are some popular options:

    Classic Farmhouse

    This style is all about rustic charm. Think reclaimed wood, chunky legs, and a natural finish. They're perfect for a cozy and inviting feel. You can find tons of free plans online for this look.

    Modern Minimalist

    For a sleek and contemporary vibe, consider a modern minimalist design. These tables often feature clean lines, simple shapes, and a focus on functionality. You can build a stylish table with plywood, metal legs, and a sleek finish.

    Industrial Chic

    Industrial-style coffee tables exude a raw, urban edge. They typically feature metal accents, exposed wood, and a distressed finish. Think vintage metal pipes or reclaimed barn wood. You can find many free plans for this style online, as well.

    Mid-Century Modern

    Mid-century modern designs offer a timeless appeal with sleek lines, tapered legs, and a use of natural materials like wood or veneer. You can find tons of free plans online for this style.

    Gather Your Materials

    Once you've chosen a design, it's time to gather your materials. Here's a general list of what you'll need:

    • Wood: Select your desired wood type based on the design you've chosen. Pine, cedar, oak, and plywood are popular choices.
    • Hardware: This includes screws, nails, glue, hinges, and any specific hardware for your design (like brackets or metal legs).
    • Tools: A saw, drill, sander, measuring tape, pencil, and a level are essential. Depending on your design, you may also need a router, chisel, or other specialized tools.
    • Finishing Supplies: Wood stain, wood sealer, paint (if needed), and brushes are all important for protecting and enhancing the look of your table.

    Finding Free DIY Coffee Table Plans

    Don't worry about starting from scratch! There are countless free DIY coffee table plans available online. Search for "free coffee table plans" on websites like Pinterest, YouTube, and woodworking forums. Many blogs and websites offer detailed instructions and cut lists to make the process easier.

    Tips for Choosing Plans

    • Skill Level: Choose plans that align with your woodworking experience. Beginner-friendly projects usually have simpler designs and more detailed instructions.
    • Dimensions: Make sure the dimensions of the table fit your space and needs.
    • Material: Choose plans that use materials you can easily access and work with.
    • Style: Select plans that fit your personal aesthetic and the overall style of your living room.

    Step-by-Step Construction

    Now comes the fun part! Once you've gathered your materials and selected a design, follow these general steps:

    Step 1: Cut the Wood

    Start by carefully cutting the wood to the dimensions specified in your plans. Double-check your measurements before making any cuts.

    Step 2: Assemble the Tabletop

    Depending on your design, you may need to join multiple pieces of wood to create the tabletop. Use glue, screws, or dowels to secure the pieces together.

    Step 3: Build the Legs

    Cut the wood for the legs and attach them to the tabletop using screws, brackets, or other hardware.

    Step 4: Sand and Finish

    Once the table is assembled, use sandpaper to smooth any rough edges and prepare the surface for finishing. Apply wood stain, sealer, or paint according to your desired look.

    Essential Tips for Success

    Here are some helpful pointers to ensure a smooth and successful DIY project:

    • Measure Twice, Cut Once: Precision is key! Take your time and double-check all your measurements before making any cuts.
    • Use Quality Wood: Invest in high-quality wood for a durable and long-lasting table.
    • Start Simple: If you're new to woodworking, start with a simple design. As you gain experience, you can tackle more complex projects.
    • Don't Be Afraid to Ask for Help: If you get stuck or need clarification, don't hesitate to consult your plans, online resources, or a fellow woodworker.
    • Have Fun! DIY projects are all about creativity and expression. Enjoy the process and let your imagination run wild!

    With a little effort and patience, you can create a stunning DIY coffee table that will be the envy of your friends and family. So roll up your sleeves, get creative, and let's build something amazing!

    [Continue reading...]

    Simple DIY Coffee Table Build with Free PDF Plans

    - 0 comments
    Simple DIY Coffee Table Build with Free PDF Plans

    Build Your Own Coffee Table: A Simple DIY Project with Free PDF Plans

    Hey there, DIY enthusiasts! Are you looking to add a touch of personal style to your living room without breaking the bank? Building your own coffee table is a fantastic way to do just that! It's a surprisingly simple project that you can tackle even if you're a beginner woodworker.

    And the best part? I'm going to share free PDF plans with you so you can get started right away. No more searching for complicated instructions or wondering how to put it all together. I've got you covered.

    Why Build Your Own Coffee Table?

    Before we dive into the build, let's talk about why building your own coffee table is so awesome.

    • Save Money: Building your own is often much cheaper than buying a pre-made table. You can choose less expensive materials and avoid the markup from retailers.
    • Personalization: You get to choose the exact size, style, and materials that fit your space and taste perfectly.
    • Sense of Accomplishment: There's something incredibly satisfying about creating something beautiful with your own hands.
    • Unique Design: Don't settle for a generic coffee table. Build something that reflects your personality and style.

    Free PDF Plans: Your Guide to Building Success

    I've created a set of easy-to-follow plans that will guide you through the entire process.

    • Detailed Cut List: I've included precise measurements for all the pieces you need to cut, so you can get started with confidence.
    • Step-by-Step Instructions: Each step is clearly explained with illustrations, so you'll know exactly what to do at every stage.
    • Material List: No need to guess what you need! The plans will tell you exactly what lumber, hardware, and tools you'll require.

    Don't worry if you're not a seasoned woodworker. These plans are designed for beginners, and I'll walk you through everything you need to know.

    Let's Get Started: The Materials You'll Need

    Before we start building, let's gather the essential materials.

    Lumber:

    Here's what you'll need for a basic coffee table. You can adjust the dimensions if you prefer a larger or smaller table.

    • Two 2x10 boards, 48 inches long (for the tabletop)
    • Four 2x4 boards, 16 inches long (for the legs)
    • Two 2x4 boards, 32 inches long (for the stretchers)

    You can choose any wood you like, but I recommend pine or spruce for their affordability and easy workability.

    Hardware:

    • Wood screws, 2 ร‚½ inches long (about 20)
    • Wood glue (a good quality one is recommended)
    • Wood stain (optional, but it's a great way to personalize your table)
    • Wood finish (optional, but it will protect your table and give it a nice sheen)

    Tools:

    • Circular saw or miter saw
    • Drill with screwdriver bits
    • Measuring tape and pencil
    • Clamps (at least two)
    • Safety glasses and dust mask

    You can also find a handy dandy project checklist in your downloadable PDF plans!

    Step-by-Step Guide to Coffee Table Construction

    Alright, let's get building! Here's a brief overview of the steps involved. Remember, you'll find more detailed instructions and images in your free PDF plans.

    1. Cutting the Lumber:

    This is where your free PDF plans come in handy! Use the cut list to accurately measure and cut all the lumber pieces to the correct dimensions. Remember to double-check your measurements before making any cuts.

    2. Assembling the Top:

    Join the two 2x10 boards for the tabletop side by side using wood glue and screws. Clamp the pieces together to ensure a strong bond.

    3. Building the Legs:

    For each leg, you'll use two 2x4 boards. Join them together to create a 4x4 leg, using glue and screws. Repeat for all four legs.

    4. Attaching the Stretchers:

    The stretchers add stability to the table. Attach them to the inside of the legs, about 3 inches from the bottom.

    5. Connecting the Legs to the Top:

    Position the legs at the corners of the tabletop, ensuring they are aligned. Secure them to the bottom of the tabletop using glue and screws. Make sure the legs are square and level.

    6. Finishing Touches:

    Sand all the surfaces of your coffee table to remove any rough edges or imperfections. Then, you can apply your chosen wood stain and finish (if desired).

    Optional: Adding Personal Touches

    Now it's time to let your creativity shine! There are tons of ways to personalize your coffee table. Here are some ideas:

    • Paint or Stencil: Add some color and pattern to your tabletop or legs.
    • Rustic Charm: Leave the wood unfinished or distressed for a charming rustic look.
    • Unique Hardware: Choose eye-catching handles or knobs for an interesting detail.
    • Shelf or Drawer: Add extra storage space with a built-in shelf or drawer.

    Congratulations! You've Built Your Own Coffee Table

    You did it! You've successfully built a stunning and unique coffee table. Now you can enjoy the fruits of your labor and show off your DIY skills to all your guests.

    And don't forget to download your free PDF plans for this project and all the other awesome woodworking projects I've created for you. I'm always happy to help you create something wonderful! Happy building!

    [Continue reading...]

    Download PDF Plans for a Simple Squirrel Box

    - 0 comments
    Download PDF Plans for a Simple Squirrel Box
    I am unable to directly download or generate PDF files. I can, however, provide you with a comprehensive guide and detailed instructions for building a simple squirrel box, along with helpful resources for finding downloadable PDF plans.

    Building a Simple Squirrel Box

    Creating a squirrel box is a rewarding project that can bring joy to both you and the neighborhood squirrels. These boxes provide safe and secure shelter, particularly during the colder months. The process is relatively simple and requires basic woodworking skills. Let's dive into the steps involved in building your very own squirrel box!

    Materials and Tools

    Before you get started, gather these essential materials and tools:

    • 1 x 8-inch pine board (approximately 8 feet long)
    • 1 x 4-inch pine board (approximately 4 feet long)
    • 1/4-inch plywood (for the roof and bottom)
    • Wood screws (various lengths)
    • Wood glue
    • Weatherproof paint or stain (optional)
    • Saw (circular or jigsaw)
    • Drill and drill bits
    • Measuring tape
    • Pencil
    • Level
    • Hammer
    • Safety goggles
    • Work gloves

    Step-by-Step Guide

    1. Cut the Boards

    Begin by cutting the 1 x 8-inch pine board into the following pieces:

    • Two pieces for the sides (12 inches each)
    • One piece for the back (12 inches long)
    • One piece for the front (12 inches long)

    Next, cut the 1 x 4-inch pine board into two pieces, each 10 inches long. These will serve as the top and bottom supports.

    Cut a piece of plywood to match the dimensions of the bottom (12 inches by 12 inches) and another piece for the roof (14 inches by 14 inches). This slightly larger roof will overhang the sides for better protection from rain.

    2. Assemble the Box

    Lay out the side, back, and front pieces of the box on a flat surface. Attach the 10-inch pieces of 1 x 4-inch pine board to the inside of the bottom edges of the sides, using wood glue and screws. These supports will hold the bottom in place.

    Attach the front and back pieces to the sides, ensuring they are square and flush. Secure them with wood glue and screws.

    3. Install the Bottom and Roof

    Secure the plywood bottom to the box, using wood glue and screws.

    For the roof, you can choose to create a simple flat roof or a slightly angled one. If you opt for an angled roof, cut a piece of 1 x 4-inch pine board (about 14 inches long) to form the ridge of the roof. Attach this piece to the center of the plywood roof using screws.

    Finally, attach the plywood roof to the top of the box, ensuring it overhangs the sides by an inch or two. Use screws to secure it to the box and the ridge piece (if you chose an angled roof).

    4. Add the Entrance

    Using a jigsaw or a saw, create a rectangular entrance on the front of the box. Make it approximately 4 inches tall and 3 inches wide. This size is generally suitable for most squirrels.

    5. Finishing Touches

    Apply a weatherproof paint or stain to the exterior of the squirrel box (optional). This will help protect the wood from the elements and enhance the appearance of the box.

    6. Installation

    Find a suitable location to install your squirrel box. A tree is ideal, but ensure the box is placed high enough to prevent ground predators from accessing it. You can use heavy-duty brackets or screws to secure the box to the tree.

    Finding Downloadable PDF Plans

    If you prefer more detailed instructions and visual aids, there are numerous websites offering downloadable PDF plans for squirrel boxes. Here are a few popular resources:

    • Ana White: This website provides a wide range of free woodworking plans, including squirrel boxes.
    • The Family Handyman: This website offers a variety of DIY projects and often features free printable plans.
    • Pinterest: This platform is a great resource for finding inspiration and downloadable plans for various woodworking projects, including squirrel boxes.

    Building a simple squirrel box is a fun and rewarding experience. You can enjoy watching these curious creatures utilize your handcrafted shelter, and contribute to their well-being. Don't hesitate to get creative and add your personal touch to the design. Enjoy the process!

    [Continue reading...]

    Build your dream magic box: woodworking inspiration

    - 0 comments
    Build your dream magic box: woodworking inspiration

    Building My Dream Magic Box: A Woodworking Journey

    Hey there, woodworking enthusiasts! Ever since I was a kid, I've been fascinated by secret compartments and hidden mechanisms. It's something about the mystery and intrigue of discovering what lies beneath the surface. So, when I finally decided to build my own magic box, I knew it had to be something special.

    The Concept: A Fusion of Functionality and Style

    I envisioned a box that wasn't just a container but a work of art, a statement piece that would spark conversations. I wanted it to be functional yet whimsical, a blend of practicality and magic.

    Functionality:

    My magic box wouldn't just hold trinkets; it would serve a purpose. I imagined it as a safe haven for my favorite tools, a place to keep my precious tools, and maybe even a secret stash of goodies.

    Style:

    I wanted a design that reflected my personal style. I was drawn to the warmth and character of reclaimed wood. Its unique textures and history would add a touch of vintage charm to the box. I also imagined intricate carvings and brass accents that would give it an antique, almost magical, feel.

    The Woodworking Process: From Sketch to Reality

    Armed with my sketches, I set out to gather the materials. I found a beautiful piece of reclaimed oak at a local salvage yard. Its rich brown color and natural knots were perfect for my vision. I also picked up some brass hinges, a sturdy lock, and a few brass knobs for added detail.

    The first step was to cut the wood to size. I carefully measured and marked the pieces, using a jigsaw to cut out the intricate shape I had in mind. The wood was surprisingly easy to work with, even with its intricate grain patterns.

    Next came the assembly. I used a combination of wood glue and screws to join the pieces together, making sure everything aligned perfectly. This part of the process was crucial, as any imperfections would be visible in the final product.

    Once the box was assembled, I began the carving. I used a variety of chisels and gouges to create a detailed pattern around the edges of the box. This was a slow and meticulous process, but I enjoyed the meditative nature of carving and the way it allowed me to bring my vision to life.

    The final step was finishing. I sanded the wood to a smooth finish and applied a coat of oil-based polyurethane to protect it from scratches and moisture. The oil brought out the richness of the wood's color and grain, giving the box a beautiful sheen.

    Hidden Compartments and Mechanisms:

    To add a touch of magic, I incorporated a few hidden compartments. One of these compartments was concealed behind a sliding panel that looked like a decorative accent. I crafted a small, magnetically-operated latch to keep it secure. Another secret compartment was hidden within the false bottom of the box, accessible through a hidden release lever. I spent a lot of time planning these compartments and ensuring they were seamlessly integrated into the overall design.

    The Finishing Touches: Adding the Magic

    With the box assembled, I added the brass hinges and lock. The lock had a keyhole disguised as a small, decorative carving, adding another layer of intrigue. Finally, I attached a small, brass knob to the lid, making it easier to open and close. I decided to use a unique knob that reminded me of an old key, again playing into the theme of secrets and hidden treasures.

    The magic of the box wasn't just in its hidden compartments; it was in the details. I had used reclaimed wood, which carried its own history and character. The intricate carvings, brass accents, and hidden mechanisms all added to the sense of wonder and intrigue.

    More than Just a Box: A Reflection of Creativity

    Building my dream magic box was more than just a woodworking project; it was a journey of self-discovery and creativity. It allowed me to tap into my imagination and bring a vision to life. I learned valuable skills, not only in woodworking but also in problem-solving and design. Most importantly, I created something unique, something that held personal meaning and that would hopefully inspire others to embrace their own creativity.

    My Advice to Aspiring Woodworkers:

  • Don't be afraid to experiment. Woodworking is a great opportunity to play with different techniques and materials. Be open to trying new things and don't be afraid to make mistakes. It's all part of the learning process.
  • Let your imagination guide you. Don't be afraid to think outside the box. There are no limits to what you can create with wood.
  • Enjoy the process. Woodworking is a relaxing and rewarding hobby. Take your time, be patient, and savor the journey of creating something beautiful with your own hands.
  • So, if you're looking for a new woodworking challenge, consider building your own magic box. It's a fun, rewarding project that will allow you to unleash your creativity and create a piece of art that is both functional and magical.

    [Continue reading...]

    DIY Squirrel Den Box for Nature Lovers

    - 0 comments
    DIY Squirrel Den Box for Nature Lovers

    DIY Squirrel Den Box for Nature Lovers

    Squirrels are a common sight in many backyards, and their playful antics can bring a smile to anyone's face. These furry creatures are often seen darting through trees, burying nuts, and even engaging in territorial disputes. While many people enjoy observing squirrels from a distance, others may wish to provide them with a little extra help, particularly during the colder months. Building a squirrel den box is a simple and rewarding project that can offer a safe and warm haven for these furry friends. This article will guide you through the process of constructing a squirrel den box, providing detailed instructions and tips for ensuring its success.

    Materials You'll Need

    To construct a squirrel den box, you will need the following materials:

    • Wooden board (1x6 or 1x8) - This will be used for the sides and bottom of the box.
    • Wooden board (1x4) - This will be used for the roof and the front panel of the box.
    • Screws or nails - These will be used to assemble the box.
    • Wood glue - This will help to strengthen the joints.
    • Weatherproof sealant - This will protect the wood from moisture and decay.
    • Paint or stain (optional) - This can be used to personalize the box and protect the wood.
    • Metal flashing or roofing shingles (optional) - These can be used to create a more durable roof.
    • Heavy-duty wire mesh (optional) - This can be used to create a ventilation system.

    Choosing the Right Location

    Before you begin construction, it's essential to choose the right location for your squirrel den box. Here are some factors to consider:

    • Height: The box should be placed at least 6 feet off the ground to deter predators and make it easier for squirrels to access.
    • Shelter: The box should be placed in a location that provides some shade and protection from the elements. A tree with thick foliage is ideal.
    • Visibility: The box should be positioned in a location where you can easily observe the squirrels, but avoid placing it in a spot that is too exposed.
    • Proximity to food sources: The box should be situated near natural food sources, such as trees with nuts or berries, or a bird feeder.
    • Safety: Ensure the location is free of potential hazards, such as power lines or busy areas.

    Building the Box

    Once you've chosen the ideal location, you can begin building the squirrel den box. Here's a step-by-step guide:

    Cutting the Wood

    First, measure and cut the wood to the desired dimensions. You will need four pieces of 1x6 or 1x8 wood for the sides and bottom of the box, and two pieces of 1x4 wood for the roof and front panel. For a standard-sized box, the dimensions might be as follows:

    • Sides: 12 inches long
    • Bottom: 12 inches long
    • Roof: 14 inches long
    • Front panel: 12 inches long

    Assembling the Box

    Now, you can assemble the box. Start by attaching the four side pieces to the bottom piece. Use wood glue and screws or nails to secure the joints. You can choose to create a simple box with a flat bottom or a slightly more complex design with a sloped bottom, which can help with drainage.

    Adding the Front Panel and Roof

    Next, attach the front panel to the box using wood glue and screws or nails. Ensure the panel is securely attached to the sides. You can cut a small hole in the front panel for the squirrels to enter and exit. The size of the entrance hole should be about 3 inches wide and 4 inches tall. This will be the main entrance for the squirrels to access the nest. You can also choose to include a second smaller hole on the back for ventilation and escape routes.

    Finally, attach the roof to the box. You can create a simple flat roof or a more complex gable roof. For a flat roof, simply attach the roof panel to the top of the box, extending it slightly beyond the edges to create an overhang. For a gable roof, create a triangular shape with two pieces of 1x4 wood and attach them to the sides of the box. You can also attach a second piece of 1x4 to create a small overhang at the bottom of the roof for added protection from the elements.

    Finishing Touches

    Once the box is assembled, apply weatherproof sealant to all exposed surfaces to protect the wood from moisture and decay. You can also paint or stain the box to personalize it and further protect the wood. For added protection and durability, you can use metal flashing or roofing shingles to cover the roof. You can even add a layer of insulation to the roof and walls for extra warmth. If you are concerned about ventilation, you can use heavy-duty wire mesh to create a ventilation system by adding small pieces of wire mesh to the sides of the box.

    Placing the Box

    When you've finished building your squirrel den box, it's time to place it in its chosen location. You can secure the box to a tree trunk or a sturdy post using strong wire or brackets. Make sure the box is securely attached and cannot be easily moved or knocked over. The height of the box is important, ensuring that it is high enough to prevent predators from accessing it. It is also important to consider the orientation of the box, ensuring that the entrance is facing the right direction. You can consider the direction of the wind and rainfall, ensuring that the entrance is not directly exposed to the elements.

    Maintaining the Box

    Once you have placed the squirrel den box, it's essential to maintain it regularly. Here are some tips for keeping the box in good condition:

    • Clean the box annually: Remove any debris or nesting materials, ensuring the box remains clean and hygienic.
    • Check for damage: Inspect the box for any signs of damage, such as cracks, holes, or loose screws. Repair any damage promptly to prevent further deterioration.
    • Refill the box: If you notice the nesting materials are getting used or damaged, refill the box with fresh bedding, such as straw or shredded paper.
    • Monitor for signs of use: Keep an eye out for signs that the box is being used by squirrels, such as fresh nesting material, droppings, or evidence of entry and exit. If you notice that the box is not being used, consider relocating it to a more suitable location.

    Attracting Squirrels to Your Box

    To encourage squirrels to use your den box, you can take a few extra steps:

    • Provide food sources: Place a bird feeder nearby or plant nut-bearing trees and shrubs in your yard. This will make your yard more attractive to squirrels.
    • Use attractant scents: You can use a squirrel attractant spray to scent the box and encourage squirrels to explore it.
    • Be patient: It may take some time for squirrels to discover and start using the box. Be patient and wait for them to become comfortable with their new home.

    Conclusion

    Building a squirrel den box is an excellent way to enhance your backyard wildlife habitat and provide a safe haven for these playful creatures. By following the instructions and tips provided, you can create a comfortable and secure dwelling for squirrels. Remember to choose the right location, use quality materials, and maintain the box regularly to ensure its longevity and the well-being of your furry residents. With a little effort and care, you can provide a much-needed sanctuary for these fascinating creatures, allowing you to enjoy their presence in your backyard for years to come.

    [Continue reading...]

    Downloadable PDF Cold Frame Plans for All Levels

    - 0 comments
    Downloadable PDF Cold Frame Plans for All Levels

    Downloadable PDF Cold Frame Plans for All Levels

    A cold frame is a simple, yet versatile structure that can extend your gardening season, allowing you to start seeds early in the spring and grow plants later into the fall. It acts as a miniature greenhouse, trapping solar heat and protecting your seedlings from the elements. Whether you're a seasoned gardener or just starting out, building a cold frame is a rewarding project that can significantly enhance your gardening experience.

    This article provides comprehensive downloadable PDF cold frame plans for various skill levels, ensuring you find the perfect design for your needs. We'll cover everything from choosing the right materials to assembling the structure, offering detailed instructions and tips along the way.

    Benefits of Using a Cold Frame

    Before diving into the plans, let's explore the advantages of incorporating a cold frame into your garden:

    • Extended Growing Season: Cold frames provide a protected environment, allowing you to start seeds earlier and harvest crops later than you could in open ground.
    • Improved Seedling Success: The controlled environment of a cold frame helps protect seedlings from frost, harsh winds, and excessive sun, promoting healthy growth.
    • Increased Productivity: By starting seeds indoors in a cold frame, you can transplant them into the garden earlier, giving them a head start on the growing season.
    • Cost-Effective: Cold frames are relatively inexpensive to build, using readily available materials like wood, polycarbonate sheets, and glass.
    • Environmental Benefits: Cold frames help conserve water by creating a microclimate that reduces evaporation, and they can also help reduce the need for chemical pesticides.

    Types of Cold Frames

    Cold frames come in various shapes and sizes, each with its own unique advantages:

    • Lean-to Cold Frames: These are typically built against a wall or fence, providing a simple and space-saving design.
    • Freestanding Cold Frames: These are self-supporting structures that can be positioned anywhere in the garden, offering greater flexibility.
    • Raised Cold Frames: These are elevated above ground level, making it easier to access the plants and providing better drainage.
    • Walk-in Cold Frames: These larger cold frames are designed for easy access, perfect for growing a variety of plants or even starting small trees.

    Downloadable PDF Cold Frame Plans

    We offer a variety of cold frame plans, each tailored to a specific skill level and design preference:

    Beginner Cold Frame Plans

    These plans are ideal for novice builders who are looking for a simple and straightforward design. They utilize basic materials and tools, making it easy to construct a functional cold frame.

    • Plan 1: Simple Lean-to Cold Frame: This plan features a basic lean-to design that can be built against an existing wall or fence. It uses recycled wood and a single pane of glass for the lid.
    • Plan 2: Freestanding Cold Frame with Polycarbonate Cover: This plan provides instructions for a small, freestanding cold frame with a durable polycarbonate cover. It's perfect for starting seeds or hardening off seedlings.

    Intermediate Cold Frame Plans

    These plans offer more advanced features and construction techniques, suitable for those with some experience in woodworking.

    • Plan 3: Raised Cold Frame with Removable Lid: This plan includes a raised platform and a removable lid for easy access to plants. It utilizes treated lumber and polycarbonate panels for a sturdy and durable design.
    • Plan 4: Freestanding Cold Frame with Sliding Doors: This plan features a freestanding cold frame with sliding doors that allow for ventilation and easy access to the plants.

    Advanced Cold Frame Plans

    These plans are designed for experienced builders who want to create a more sophisticated and custom-designed cold frame.

    • Plan 5: Walk-in Cold Frame with Insulated Walls: This plan provides instructions for a spacious walk-in cold frame with insulated walls for optimal temperature control. It incorporates a variety of materials and construction techniques.
    • Plan 6: Modular Cold Frame System: This plan offers a flexible and scalable cold frame system that can be easily expanded or customized. It utilizes prefabricated modules that can be arranged in various configurations.

    Choosing the Right Materials

    The materials you choose for your cold frame will depend on your budget, desired features, and the climate you live in.

    • Frame:
      • Wood: The most common material for cold frame frames, offering durability and affordability. Choose treated lumber for outdoor use.
      • Metal: Provides a more modern look and can be more durable than wood, but may be more expensive. Consider aluminum or galvanized steel.
      • PVC: Lightweight and easy to work with, but may not be as strong as wood or metal.
    • Cover:
      • Glass: Provides excellent light transmission but can be heavy and fragile. Use thick, tempered glass for durability.
      • Polycarbonate: A lightweight and durable option that offers excellent light transmission and insulation. Choose a UV-resistant type for longevity.
      • Acrylic: Similar to polycarbonate, but may be less durable. It's lighter and easier to work with but may yellow over time.
    • Soil: Use a well-draining potting mix or a combination of potting mix and garden soil.

    Building Your Cold Frame

    Once you have chosen your plans and materials, it's time to build your cold frame. Follow these general steps:

    • Prepare the Site: Choose a location that receives at least 6 hours of sunlight per day. Level the ground and ensure proper drainage.
    • Cut and Assemble the Frame: Refer to your chosen plans for detailed cutting and assembly instructions. Use appropriate tools and techniques for your chosen materials.
    • Install the Cover: Attach the cover to the frame, ensuring it's securely fastened and provides a tight seal. Consider using weatherstripping or other sealing materials.
    • Add Soil and Ventilation: Fill the cold frame with soil, leaving enough room for your plants. Include a ventilation system to regulate temperature and prevent humidity build-up.

    Tips for Using Your Cold Frame

    To get the most out of your cold frame, follow these helpful tips:

    • Monitor Temperature: Use a thermometer to track the internal temperature of your cold frame and adjust ventilation accordingly.
    • Water Regularly: Keep the soil moist, but avoid overwatering. The cover will help retain moisture, reducing the need for frequent watering.
    • Ventilate When Needed: Open the lid or vents to allow for air circulation and prevent overheating. This is particularly important on warm days.
    • Protect from Pests: Use row covers or other pest control methods to prevent insects and other pests from damaging your plants.
    • Clean Regularly: Remove any debris or weeds to maintain a clean and healthy growing environment.

    Conclusion

    Building a cold frame is an excellent way to extend your gardening season and enhance your plant growth. The downloadable PDF plans provided in this article cater to various skill levels, ensuring you can find the perfect design for your needs and budget.

    By choosing the right materials and following the instructions carefully, you can create a functional and beautiful cold frame that will benefit your garden for years to come.

    [Continue reading...]

    Build a Squirrel Den Box with Limited Tools

    - 0 comments
    Build a Squirrel Den Box with Limited Tools

    Building a Squirrel Den Box with Limited Tools

    Squirrel den boxes, also known as squirrel nesting boxes, provide a safe and secure haven for squirrels, particularly during breeding season and harsh weather conditions. While specialized tools and materials are often recommended for constructing these boxes, it's possible to build a functional and appealing squirrel den box using readily available tools and resources.

    Materials

    For this project, we'll focus on using materials that are commonly found in most households and readily accessible at hardware stores.

    Wood

    The primary material for the squirrel den box will be wood. Opt for durable and weather-resistant wood types like cedar, redwood, or pressure-treated lumber. Avoid using pine or other softwoods that are prone to decay and damage.

    • Bottom Panel: 1/2-inch thick wood, dimensions matching the desired base of the box.
    • Side Panels (2): 1/2-inch thick wood, height of the box minus the thickness of the bottom panel.
    • Front Panel: 1/2-inch thick wood, the same width as the side panels, with a pre-cut entry hole.
    • Back Panel: 1/2-inch thick wood, same width as the side panels.
    • Roof Panel: 1/2-inch thick wood, dimensions slightly larger than the bottom panel to create an overhang.
    • Entry Hole: Cut a circular or rectangular opening in the front panel, sized appropriately for the squirrel species. For Eastern Gray squirrels, a 6-inch diameter hole is typically recommended.

    Fasteners

    Select fasteners that are strong enough to hold the wooden panels together securely and resist the elements. Consider using:

    • Wood Screws: 1-1/2-inch or 2-inch screws, with a diameter of at least 10 gauge. Choose stainless steel or galvanized screws for long-lasting durability.
    • Nails: Galvanized or stainless steel nails, 1-1/2-inch or 2-inch long.

    Other Materials

    • Wood Glue: Use a high-quality wood glue to enhance the bond between the wooden panels and add extra strength to the structure.
    • Paint or Stain: Optional for protecting the wood and enhancing the visual appeal of the box. Choose exterior-grade paints or stains for long-lasting protection against the elements.
    • Felt or Straw: Optional for providing a soft and comfortable nesting material. This can be placed inside the box after construction.

    Tools

    This project can be completed with basic tools found in most toolboxes or readily available at hardware stores.

    • Measuring Tape: Accurately measure the dimensions of the box and the materials.
    • Pencil: Mark the wood for cutting and drilling.
    • Saw: Cut the wood panels to the desired dimensions. A handsaw, circular saw, or jigsaw can be used depending on the available equipment and level of comfort.
    • Drill: Create pilot holes before screwing the panels together, and for attaching the hinges to the roof if desired.
    • Screwdriver: Drive screws securely into the wood.
    • Hammer: Drive nails into the wood for added support.
    • Clamps: Hold the wood panels together while gluing and screwing them.
    • Sandpaper: Smooth the edges and surfaces of the wood to prevent splintering.

    Construction Process

    Follow these steps to build your squirrel den box:

    1. Cutting the Wood Panels

    Using a measuring tape and pencil, mark the wood panels according to the desired dimensions of the box. Carefully cut the panels using the selected saw, ensuring clean and straight cuts. For the front panel, cut a circular or rectangular entry hole using the saw, jigsaw, or drill bit.

    2. Assembling the Base

    Place the bottom panel on a flat surface. Align the side panels along the edges of the bottom panel, ensuring they are flush and perpendicular to the bottom. Apply wood glue to the edges of the bottom panel and the side panels. Clamp the panels together, ensuring they are securely held in place. Drill pilot holes and screw the panels together. Repeat this process for the back panel.

    3. Attaching the Front Panel

    Place the assembled base upside down on a flat surface. Align the front panel with the open side of the base, ensuring the entry hole faces the front. Apply wood glue to the edges of the front panel and the base. Clamp the panels together and secure them with screws.

    4. Constructing the Roof

    Place the roof panel on a flat surface. Measure the width of the base of the box and mark the center point of the roof panel. Using a drill, create two pilot holes near the center mark. Attach hinges to the roof panel at the pilot hole locations. Measure the length of the base of the box and mark the center point on the back panel of the box. Drill two pilot holes near the center mark.

    5. Attaching the Roof to the Box

    Place the box on a flat surface. Align the hinges on the roof panel with the pilot holes on the back panel of the box. Secure the hinges using screws. Gently lift the roof panel to ensure it opens and closes smoothly.

    6. Adding the Finishing Touches

    Sand the edges and surfaces of the box to prevent splintering and improve the overall appearance. Apply a coat of exterior-grade paint or stain if desired. After the paint or stain has dried, you can place nesting material inside the box, such as felt or straw.

    Installing the Squirrel Den Box

    Once your squirrel den box is complete, choose a suitable location for its installation. Aim for a location with good visibility and some protection from the elements.

    • Height: Install the box at least 10 feet above ground level. This will help to discourage predators and make it difficult for squirrels to be easily observed.
    • Protection: Place the box in a sheltered spot away from direct sunlight and strong winds. A tree or a large bush can offer natural protection.
    • Accessibility: Ensure the box is accessible for cleaning and maintenance, without posing any safety risks.

    By following these steps, you can create a safe and comfortable home for squirrels in your backyard using basic tools and common materials. Enjoy the joy of watching these playful and curious creatures thrive in their new den!

    [Continue reading...]

    DIY Cold Frame Projects with PDF Guides

    - 0 comments
    DIY Cold Frame Projects with PDF Guides

    DIY Cold Frame Projects with PDF Guides

    Are you looking for a simple and effective way to extend your gardening season? Building a DIY cold frame is a fantastic solution! Cold frames are mini-greenhouses that create a warm, protected environment for your plants, allowing you to start seeds earlier in the spring, protect them from frost in the fall, and even overwinter certain plants. This article will guide you through building your own cold frame with easy-to-follow PDF guides for a range of styles.

    Benefits of Building a DIY Cold Frame

    Building your own cold frame offers numerous advantages over purchasing one:

    • Cost-effective: DIY cold frames can be built with inexpensive materials, saving you a considerable amount of money compared to store-bought models.
    • Customizable: You can design and build your cold frame to fit your specific needs and garden space.
    • Educational: Building a cold frame is a rewarding project that lets you learn new skills and take pride in your creation.
    • Eco-friendly: By using recycled or repurposed materials, you can create a sustainable and eco-conscious gardening solution.

    Choosing the Right Cold Frame Design

    There are several different cold frame designs to choose from, each with its own advantages:

    Traditional Cold Frames

    Traditional cold frames have a wooden frame and a glass or polycarbonate lid. They offer excellent insulation and light transmission, making them ideal for starting seeds and protecting young plants.

    Raised Bed Cold Frames

    These cold frames are built into a raised garden bed, providing a convenient and aesthetically pleasing setup. They are especially useful for small gardens or areas with limited space.

    Mini Cold Frames

    Mini cold frames are perfect for starting small batches of seeds or protecting individual plants. They are compact and easy to move around, making them ideal for balcony gardeners or those with limited space.

    Recycled Cold Frames

    Get creative and repurpose old windows, doors, or other materials to build a unique and sustainable cold frame. This is a great way to save money and reduce waste.

    PDF Guides for DIY Cold Frame Projects

    To help you build your own cold frame, we've compiled a collection of downloadable PDF guides:

    Simple Wooden Cold Frame

    This guide provides step-by-step instructions for building a basic wooden cold frame with a glass lid. It includes detailed drawings, a materials list, and tips for success.

    Raised Bed Cold Frame with Polycarbonate Lid

    Learn how to build a raised bed cold frame with a durable polycarbonate lid for added strength and insulation. This guide includes instructions for both the bed and the lid, along with material recommendations.

    Mini Cold Frame from Recycled Materials

    Discover how to create a mini cold frame using recycled materials like old window panes or plastic containers. This guide provides creative ideas and instructions for building a functional and eco-friendly cold frame.

    Essential Tips for Building Your Cold Frame

    • Choose the right location: Select a sunny spot with well-drained soil. Ensure the cold frame is placed in a location that receives at least 6 hours of sunlight daily.
    • Use durable materials: Choose weather-resistant materials for the frame and lid, such as treated lumber, polycarbonate, or glass. Ensure the lid provides good insulation and light transmission.
    • Consider ventilation: Incorporate ventilation holes or a system for opening the lid to regulate temperature and prevent condensation buildup.
    • Prepare the soil: Fill the cold frame with a well-draining soil mix that is rich in organic matter.

    By following these tips and utilizing the PDF guides provided, you'll be well on your way to building your own cold frame and extending your gardening season. Enjoy the rewards of fresh, homegrown produce!

    [Continue reading...]

    Diy grill gazebo construction: easy plans for everyone

    - 0 comments
    Diy grill gazebo construction: easy plans for everyone

    DIY Grill Gazebo Construction: Easy Plans for Everyone

    Imagine this: a warm summer evening, the tantalizing aroma of grilling food fills the air, and you're relaxing in the comfort of your very own grill gazebo. No more battling the elements or squinting at the sun. With a DIY grill gazebo, you can create a dedicated space for grilling and entertaining that's both functional and stylish. This comprehensive guide provides easy-to-follow plans, regardless of your construction experience, empowering you to build your dream gazebo.

    Planning Your Grill Gazebo

    Before you start hammering and sawing, it's essential to plan your gazebo project meticulously. This includes determining the size, style, and materials.

    Size and Style

    The size of your gazebo should comfortably accommodate your grill, seating, and any additional features like storage. Consider the dimensions of your grill and the number of guests you typically entertain. You can choose from various styles, such as a classic rectangular design, an octagonal gazebo for a more unique look, or even a curved design for a modern touch.

    Materials

    When selecting materials, consider your budget, aesthetic preferences, and durability. Common materials include:

    • Wood: Durable, versatile, and readily available. Choose treated lumber for longevity.
    • Metal: Provides strength and low maintenance. Aluminum is lightweight and rust-resistant.
    • PVC: Lightweight, weather-resistant, and budget-friendly.

    Additionally, consider the roofing material. Options include vinyl, metal, or canvas, each offering different benefits in terms of cost, durability, and appearance.

    Step-by-Step Construction Guide

    Let's get down to business! Here's a detailed guide for building your grill gazebo:

    Step 1: Foundation

    Start by preparing a solid foundation for your gazebo. You have a few options:

    • Concrete: Provides the most robust and durable foundation.
    • Paver stones: A visually appealing and relatively easy option.
    • Pressure-treated lumber: Budget-friendly and suitable for lighter gazebos.

    Ensure the foundation is level and large enough to support the gazebo's weight.

    Step 2: Framing

    Now, let's assemble the framing, which provides the structure for your gazebo.

    • Cut lumber: Use a saw to cut the lumber to the desired lengths according to your plans.
    • Connect pieces: Securely join the frame pieces using screws, bolts, or specialized connectors.
    • Construct the roof: Create the roof frame by cutting and joining rafters, and secure them to the top of the gazebo.

    Be sure to check for squareness and levelness throughout the process for a sturdy gazebo.

    Step 3: Roofing

    Next, you'll install the roofing material.

    • Install sheathing: Place sheathing boards over the roof frame to create a solid base for the roofing.
    • Apply roofing: Attach your chosen roofing material following the manufacturer's instructions.

    For vinyl or metal roofing, consider using roofing nails and flashing. For canvas roofing, secure it with tensioning systems.

    Step 4: Siding and Trim

    To enhance the gazebo's appearance and provide additional protection, add siding and trim.

    • Install siding: Attach siding boards to the gazebo's exterior, following your design plan.
    • Add trim: Install trim pieces around windows, doors, and the roofline for a finished look.

    Choose siding and trim materials that complement your gazebo's overall style.

    Step 5: Finishing Touches

    Finally, personalize your gazebo with decorative elements.

    • Paint or stain: Enhance the gazebo's appearance by painting or staining the wood or metal surfaces.
    • Install lighting: Add lighting for ambiance and safety. Consider LED lights for energy efficiency.
    • Add accessories: Enhance the gazebo with accessories like curtains, screens, or a ceiling fan for greater comfort.

    Your DIY grill gazebo is now ready to transform your outdoor space into a welcoming haven for grilling and entertaining.

    [Continue reading...]

    Creating a custom magic box: diy woodworking plans

    - 0 comments
    Creating a custom magic box: diy woodworking plans

    Creating a Custom Magic Box: DIY Woodworking Plans

    Hey there, fellow woodworking enthusiasts! Are you looking for a fun and unique project that will impress your friends and family? Then look no further than building your own magic box! These captivating boxes, also known as secret boxes or puzzle boxes, are not only aesthetically pleasing but also offer a touch of magic and mystery.

    In this guide, we'll delve into the world of DIY magic boxes, providing you with step-by-step plans and tips to create your very own masterpiece. Whether you're a seasoned woodworker or just starting out, this project is sure to spark your creativity and provide a sense of accomplishment.

    Choosing the Right Wood

    The first step in your journey to crafting a magic box is selecting the perfect wood. This is an important decision, as it will affect both the appearance and durability of your finished product. Consider the following factors:

    Appearance:

    • Hardwoods like maple, cherry, walnut, and oak offer beautiful grain patterns and rich colors, making them ideal for showcasing the intricate details of your box.
    • Softwoods such as pine and cedar are more affordable and offer a rustic charm.
    • Exotic woods like mahogany, rosewood, and zebrawood provide unique textures and striking patterns.

    Durability:

    • Hardwoods tend to be more resistant to scratches and dents, making them suitable for boxes that will be handled frequently.
    • Softwoods can be more prone to damage, but they are still suitable for lighter-duty boxes or those with a more rustic aesthetic.

    Workability:

    • Hardwoods can be harder to work with, requiring sharper tools and more precise cuts.
    • Softwoods are generally easier to cut and shape, making them a good choice for beginners.

    Ultimately, the best wood for your magic box depends on your personal preference, budget, and desired aesthetic. Experiment with different species and see what resonates with you.

    Designing Your Magic Box

    Now that you've chosen your wood, it's time to unleash your creativity and design your magic box. The possibilities are endless, but here are some ideas to get you started:

    Simple and Elegant:

    • A classic rectangular box with a hidden compartment or a sliding mechanism for opening.
    • A cylindrical box with a twist-open lid.

    Intricate and Challenging:

    • A box with multiple layers and secret compartments.
    • A box with a complex puzzle mechanism that requires solving a series of riddles to open.

    Themed and Unique:

    • A treasure chest box with intricate carvings and metal accents.
    • A whimsical box inspired by a fantasy novel or movie.

    Sketch your ideas, explore different designs online, and consider the level of complexity you're comfortable with. Remember, the most important thing is to have fun and let your imagination run wild.

    Gathering the Tools and Materials

    Before you start building, ensure you have all the necessary tools and materials on hand. Here's a comprehensive list to get you started:

    Tools:

    • Table saw: For accurate cuts and ripping wood.
    • Miter saw: For making precise angled cuts.
    • Router: For creating decorative edges and shaping wood.
    • Drill press: For drilling precise holes and mortises.
    • Hand tools: Including a hammer, screwdriver, chisel, and sandpaper.
    • Clamps: For securing wood pieces during assembly.
    • Measuring tape: For accuracy in your cuts and measurements.
    • Pencil: For marking your wood.
    • Safety glasses: To protect your eyes while working with wood.

    Materials:

    • Wood: Choose your preferred species and ensure you have enough for your design.
    • Hinges: For securing the lid or doors of your box.
    • Locks and keys: For added security and a touch of mystery.
    • Wood glue: For strong and durable bonds between wood pieces.
    • Finish: Choose a stain, paint, or sealant to protect your box and enhance its appearance.

    Remember, this is just a general list. Depending on the complexity of your design, you may need additional tools and materials. Be sure to research specific instructions and techniques based on your chosen design.

    Building the Box

    Now comes the exciting part รข€" building your magic box! Follow these steps to ensure a smooth and successful construction process:

    Step 1: Cutting the Wood

    • Carefully measure and mark your wood according to your design. This is a crucial step for ensuring a well-fitting and sturdy box.
    • Use your table saw or miter saw to make clean and precise cuts. Double-check your measurements before making any cuts.

    Step 2: Assembling the Box

    • Apply wood glue to the joints of your box and carefully clamp them together. Ensure even pressure is applied to all sides.
    • Use screws, nails, or dowels to further secure the joints. This will provide additional strength and stability to your box.

    Step 3: Adding the Hidden Compartment

    • If your design includes a hidden compartment, create a separate box or shelf within the main box. Secure it with hinges, magnets, or other clever mechanisms.
    • Consider adding a false bottom or secret panel to conceal the compartment from view.

    Step 4: Installing the Lid or Doors

    • Attach the lid or doors to the box using hinges. Make sure the hinges are placed correctly for smooth and secure opening and closing.
    • Add any decorative touches, such as handles, latches, or ornamental hardware.

    Step 5: Finishing the Box

    • Sand the box thoroughly to remove any rough edges or imperfections.
    • Apply your chosen finish. This could be a stain, paint, or sealant, depending on your desired aesthetic.

    Adding the Magic Touch

    Once your box is built and finished, it's time to add that extra touch of magic that sets it apart. Here are some creative ideas:

    Secret Mechanisms:

    • Sliding panels: Create a hidden compartment that slides open or closed.
    • Hidden latches: Incorporate a small, inconspicuous latch that releases the lid or a secret panel.
    • Rotating mechanisms: Design a box with a rotating section that reveals a hidden compartment or changes the way it opens.

    Puzzles and Challenges:

    • Combination locks: Add a combination lock that requires a specific sequence to open.
    • Slide puzzles: Design a box with a series of sliding panels that need to be arranged in a specific order to unlock.
    • Riddle boxes: Include a small riddle or inscription that needs to be solved to open the box.

    Thematic Details:

    • Carvings: Add intricate carvings to the box, reflecting its theme or purpose.
    • Inlays: Use contrasting wood species or other materials to create decorative patterns.
    • Metal accents: Incorporate metal hardware, such as hinges, latches, or decorative plates.

    Don't be afraid to experiment and try different combinations of mechanisms and details to create a truly unique and magical box.

    Final Touches and Inspiration

    As your magic box takes shape, remember to personalize it to make it truly your own. Consider adding a hidden compartment for treasured mementos, a secret message etched inside, or a personalized inscription on the lid.

    For inspiration, explore online communities, woodworking blogs, and books dedicated to magic boxes. Study the designs and techniques of experienced crafters to gain insights and learn new tricks. Remember, the joy of creating a magic box lies in the process of exploration and experimentation.

    Now that you have all the tools, knowledge, and inspiration, go forth and create a magic box that will be cherished for years to come!

    [Continue reading...]
     
    Copyright © 2012. Line New - Posts · Comments
    Powered by Blogger